FMB Tutorial - Home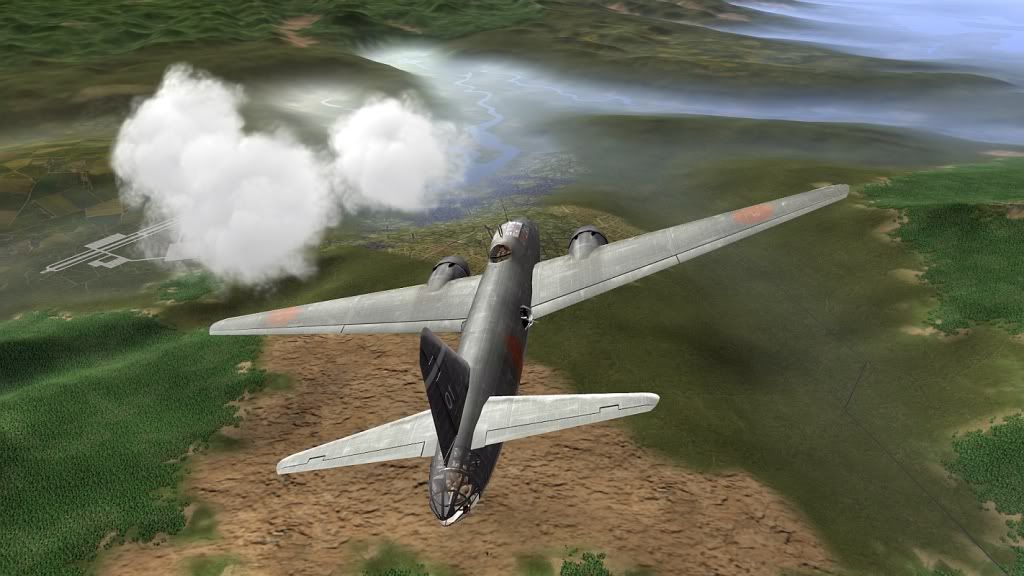
Hi there! How have you been going with your objects? Good I hope. Let's have a look at Level Bombing.
 PART ONE:
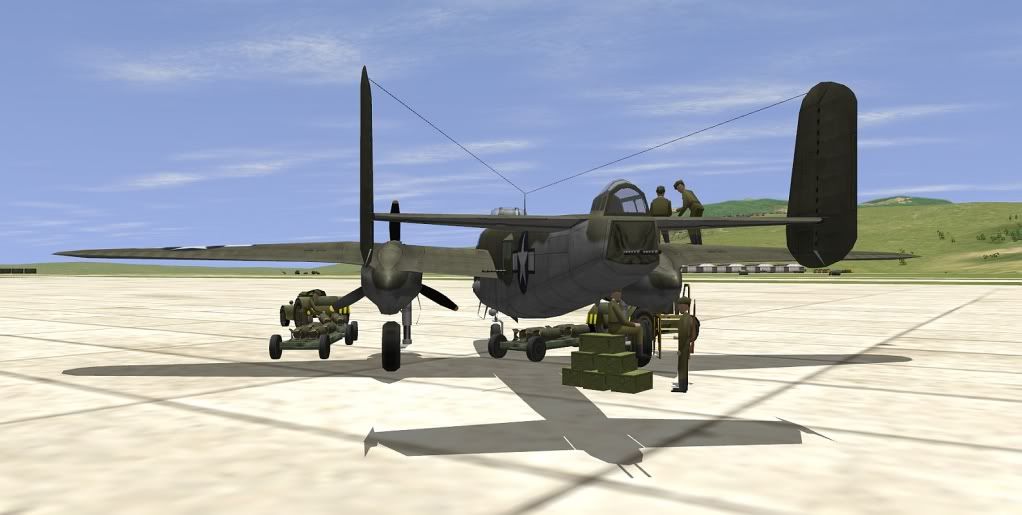
Here's Wheeler Field. I've populated it with a B-25 Bombardment Group, and made a 'template' so I could add this scene easily to the previous missions. So... lets ramp up the action and go blow shit up! Well, the bad guys are going to anyway...

Open 'Two-Ship Scramble' and save it as '
Battle of Wheeler Field_01'. We're gonna take our simple intercept mission on the Ki-43s and amp it up into a bomber intercept mission. And for THAT, we need bombers...
We need targets too, so add your Wheeler Field Template now if you haven't already. See how in FMB Tutorial 06.

Okay. Bombers are really easy to setup. There are two main ways that most guys use, each with it's pros and cons as you'll see. You don't
have to choose, you can use either method depending on what you're wanting to accomplish with your mission design.
Let's have a look at the first method for PART ONE of this tutorial. For want of a better name let's call it the 'Standard' method.
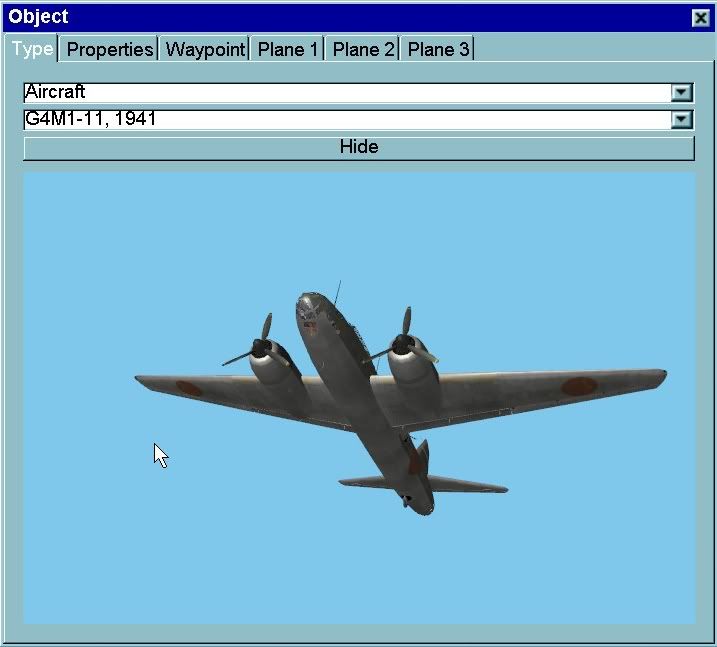
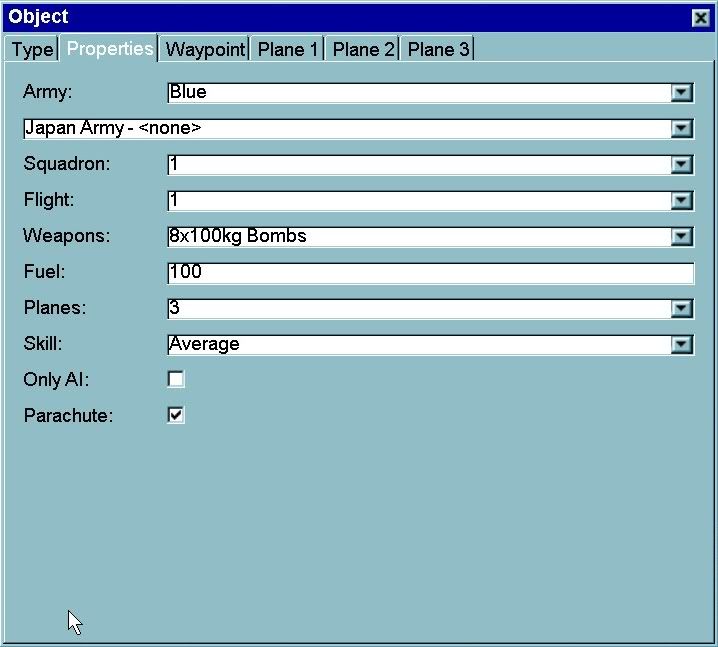
Select the Ki-43s we have been using previously in 'Two-Ship Scramble' and change the 'Type' to G4M1 Bettys. Make sure to give them a loadout: I've given mine 8 x 100kg bombs and I've changed the flight to a three-ship.
I don't recommend four-ships for bombers, as I've found
if there are problems with mid-air collisions, or aircraft doing the 'funky-chicken' to maintain formation, usually number four is the problem plane.
Why should there be formation problems in the first place? Well there shouldn't, but IMHO, IL-2 was designed as a
tactical simulator and it's stretching the game engine to include bombers, especially large 'strategic' bombers. If you look at bombers operating in flights, you'll see that really they're performing like big-ass fighters, which isn't
all that Realistic
TM and is pretty tricky for bombers to pull off with their big-ass flight models. Other problems crop up too, such as in certain circumstances if the flight leader is hit and starts to auger in, the rest of the flight will follow, often right down to the deck. Patches and mods may mean that your mileage varies - but you can see the potential 'issues'. Let's carry on though, because there
are valid reasons you may want to persevere with this 'standard' method, and never fear the
next method will neatly work around many of these problems (albeit with trade-offs). If you
do try four-ships, and you're having problems, try three-ships and see if it helps.

Of course, we're using an air-start here, and unless there's a specific reason that you want to have your bombers taking off in the mission, I
really like air-starts for bombers. If you do design bomber takeoffs into your missions, be prepared for a fair bit of work to get the bombers to climb-out and form-up as you want. Often it seems, losses due to mid-air collisions are almost inevitable, and it can be pretty damn frustrating (and immersion killing) if what you really want to do is just get into the air and fight. I'm definitely not saying it
can't be done - just make sure that it's
necessary for your mission design -and if it's not, think seriously about an air-start.
Let's set up our bomb run!
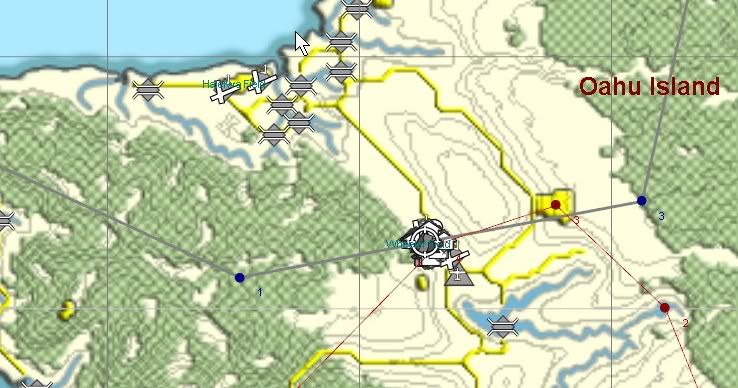


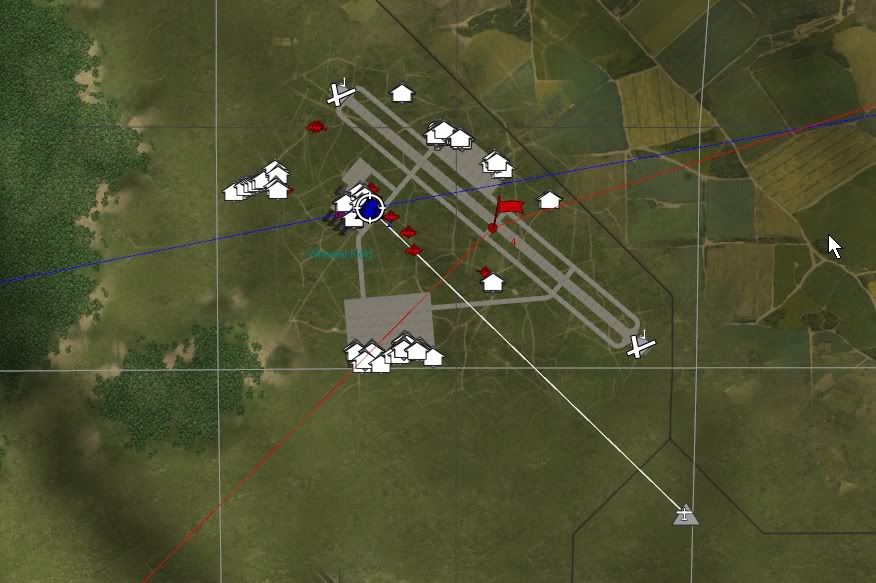
We can re-use the waypoints for our recon Ki-43s, just adjusted a bit so that we have included
three waypoints in a straight 'bomb-run' over our target. We change the middle waypoint of the three (waypoint '2' in our mission) to GATTACK, and make sure that there is sufficient distance to the prior waypoint to account for the bombs' trajectory to the ground (5-7 km should be plenty in this case). If you don't allow enough distance between the GATTACK and prior waypoints for the bombs to fall they'll go long, naturally enough.


Run a check flight to test your waypoints, your bombs should fall on the GATTACK waypoint.
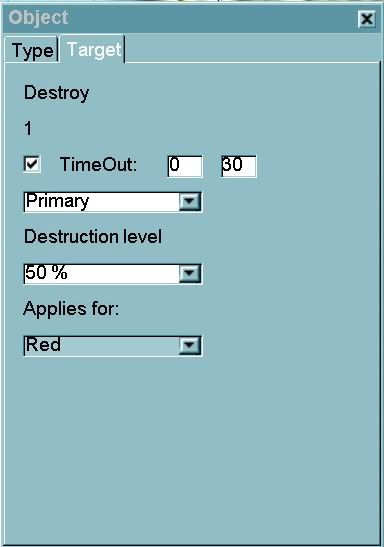
Assign a DESTROY target objective on the bomber flight - I'm just re-using the objective from 'Two-Ship Scramble' but I've set mine to 50% so I'll have to get at least two of the three bombers to win the mission - play a test mission and see how you go!
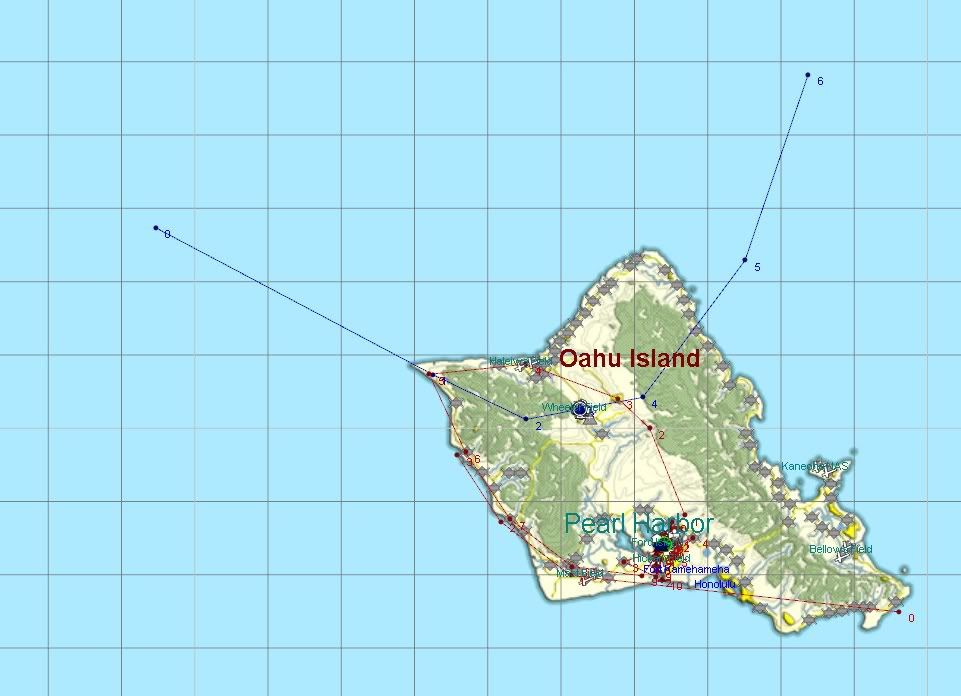
After a test play I extended both the red and blue flight plans to the west a bit - my design for the mission is to shoot down the bombers
before they hit Wheeler Field...
if the player is good enough. I allowed a bit more time on the DESTROY target objective (30 mins) to account for the time to get to the battle area and deal with the tougher targets. On the next play thru I bagged two, and my wingie got the other one, all before they dropped their bombs
and before the mission objective timed out. Nice.
Easy right?
 Tip:
Tip: Watch out for tail gunners - they're freakin' snipers at the higher skill settings! You might even want to try one of the AI mods that tones down their preternatural gunnery a bit.

Let's finish off the mission by adding a second flight of bombers. We should end up with quite a nice air battle.
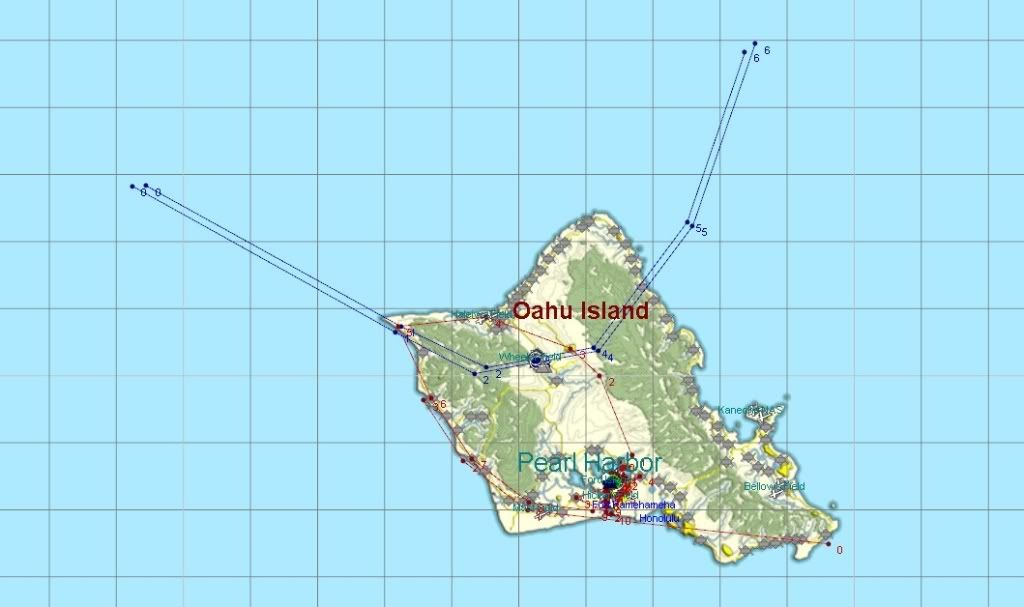
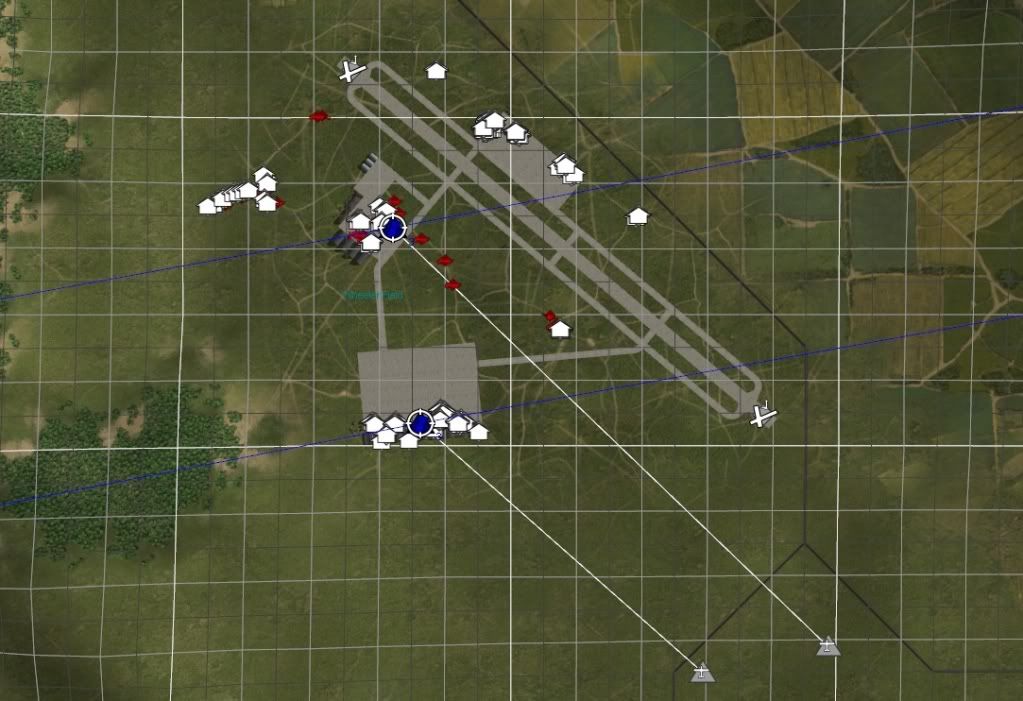
The second flight of bombers should be stacked and echeloned - they should have some vertical and horizontal separation so the flights don't collide into each other. I've chosen to stack my second fight 300m higher, and they're echeloned about a 1000m or so behind the first flight. I've also added a GATTACK waypoint for the second flight of bombers, and a second DESTROY target objective - so now the player's mission is to down at least two bombers from each flight before the mission times out. Test play the mission at 8x speed to check your bomber's flight plan - then hop in a Bearcat and see how you go!
I really like the balance of this mission. It's challenging, but not impossibly so, with lots of action going on for the player. It feels like a
complete mission and I need to use my wingman tactically to achieve the objective, which helps me feel invested in his fate. The mission can be completed in about 45mins, which is a nice length for a game. All we need to finish off the mission is a creative and entertaining briefing, and some attention to detail: for example we can fine tune our timings so the mission objective times out just before the bombs fall on Wheeler Field. The creativity and attention to detail you provide will be those finishing touches that make your mission feel professional when you play it or share it with your mates.
PART TWO: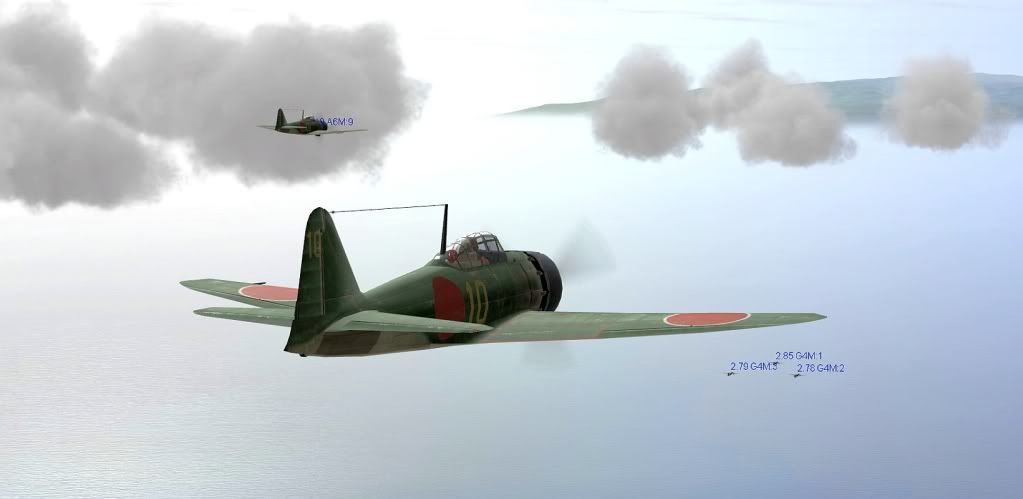
Next we're going to add some AI fighters, both as escorts and as interceptors. Before we do, we need to think carefully about how the presence of enemy fighters is going to change the balance and focus of our mission. I think that trying to shoot down the bombers while dealing with enemy fighters would be a pretty frustrating experience for the player - and when the enemy fighters engage, the focus of the mission is clearly going to center on fighter vs fighter combat. I think we have two choices for our mission:
1. We could make the
Primary Objective returning to base with a Recon Objective (rather than the primary objective being to shoot down the bombers as above) so now we can engage the bombers as the tactical situation develops. If we need to engage the fighters instead, we can, without worrying about failing the mission. Make the DESTROY targets 'Hidden Objectives' - so we'll get a nice bonus if we manage to out-maneuver the fighters
and knock down one or both of the bomber flights.
2. We could assign friendly AI elements to engage the bombers, and one of the enemy fighter elements. We can choose an enemy fighter element as our own Primary Target Objective in the mission plan and see if we can take the fighter element down.
I'm choosing the second option.
Your choices might be different for
your mission design -
but the point is to think thru how the mission is going to play out and make sure the player is at the center of the action and the mission is challenging, but even more importantly... fun. 
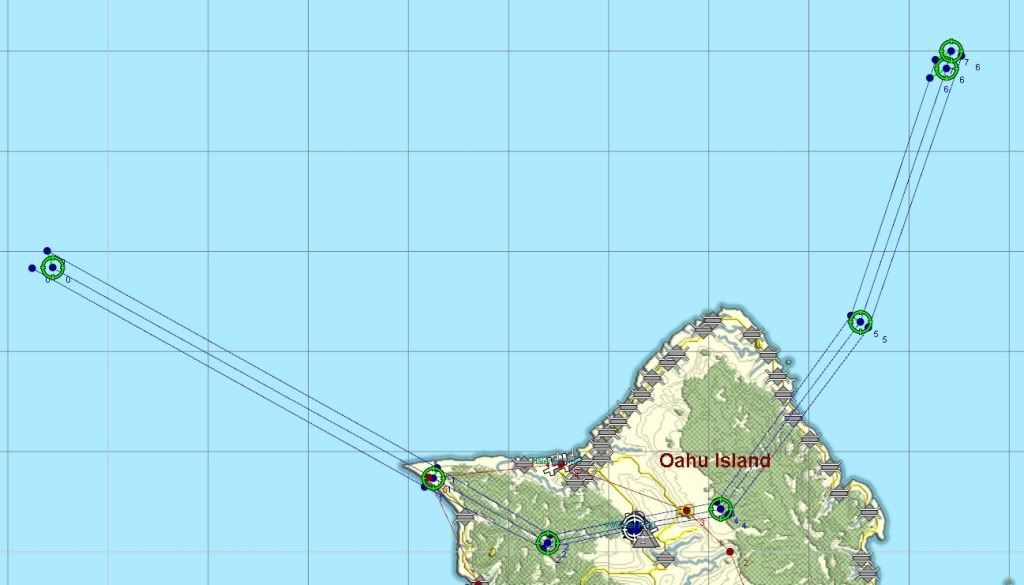
The addition of enemy fighters will make this play as an
entirely different mission, so open 'Battle of Wheeler Field_01' and save it as a new mission: '
Battle of Wheeler Field_02'. We start off by selecting a pair of fighters and plotting waypoints in 'formation' with the bomber flight we want to escort. Just like the two bomber flights, the fighters need to be stacked and echeloned to avoid collisions (although in this case the fighters will not follow
all the waypoints exactly, as you'll see).

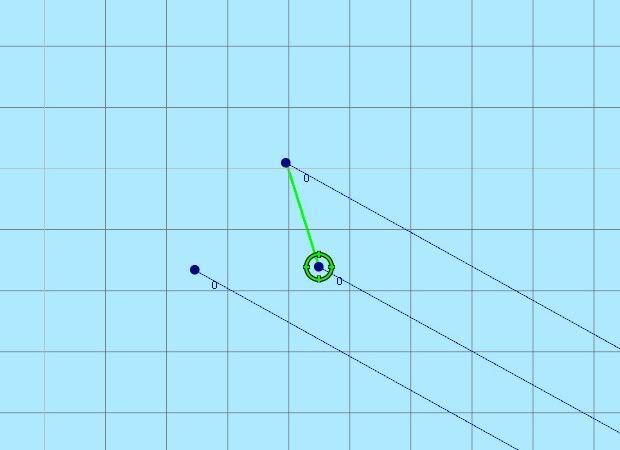
To command the Zeros to escort the bombers all we do is select each fighter waypoint, click 'Target ---> Set' and attach the green crosshairs to each corresponding bomber waypoint. Don't get confused with the ESCORT 'Target Objective' - remember that the target objectives are simply 'goals' to complete the mission and award the player points for their completion. Target objectives allow you to accomplish the mission, but they
don't tell the AI what to do. The 'Target ---> Set' button 'attaches' one AI plane to another in a context-sensitive way: in this context the fighter flight will escort the bomber flight to which it has been attached. By attaching all the waypoints we ensure the fighters will escort their bombers for the entire mission. The fighters will weave and turn to stay on station with the bombers in a very satisfying fashion.
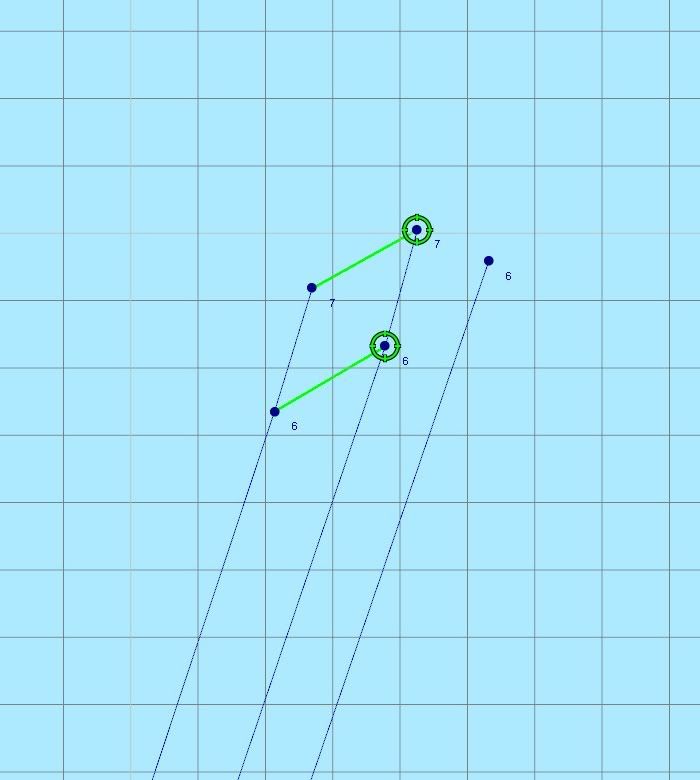 Here's a little trick for you to try:
 The fighters will
stop escorting at the second last waypoint, so add a short
extra waypoint at the end to ensure the fighters escort all the way. Run a check flight at 8x speed to ensure your waypoints are working as you intended.
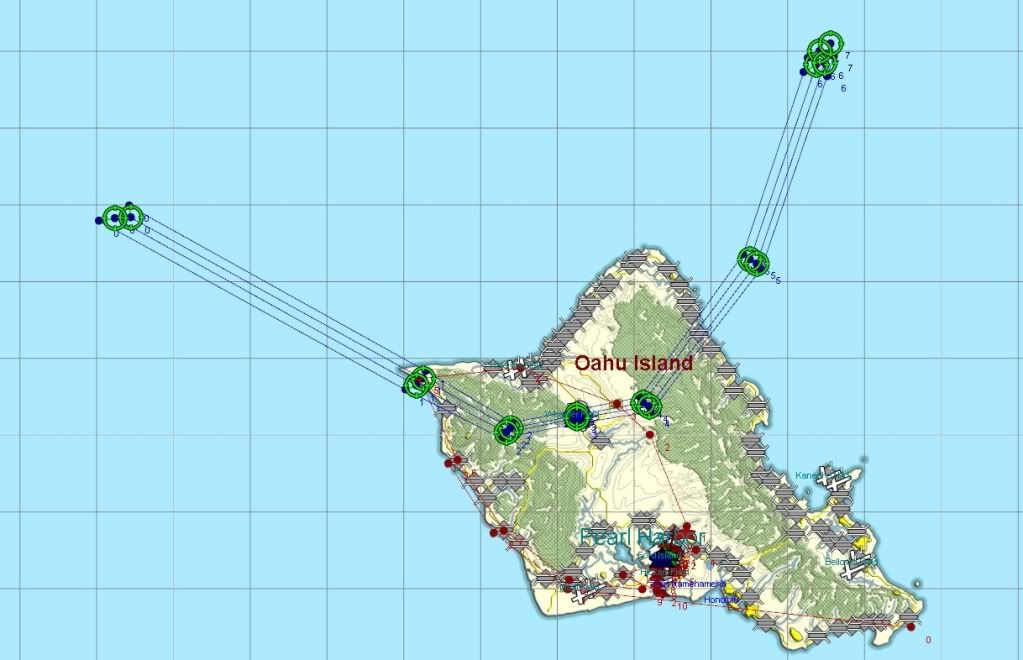
It's a piece of cake to add a second element of enemy fighters to escort the second flight of bombers. Run a check flight at 8x speed to make sure every thing is working before advancing to the next step.
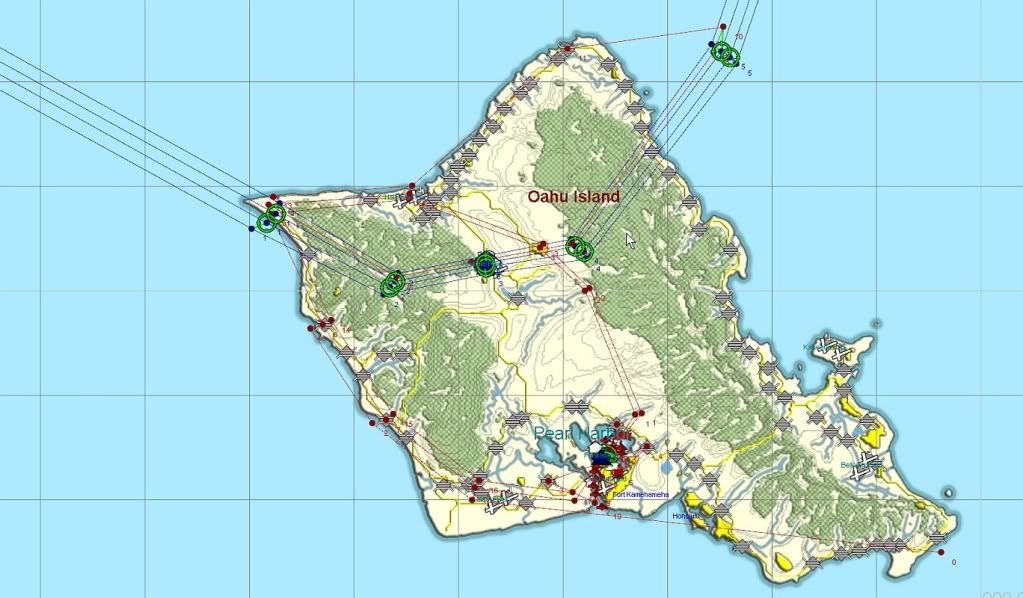
The next step is to add the friendly AI interceptor elements. I've chosen a pair of Bearcats to intercept the first Bomber flight. I've plotted waypoints for the interceptors (including takeoff) stacked and echeloned with the player's element, all the way to the interception waypoint. After the interception waypoint I've plotted waypoints to correspond with the target bomber flight's waypoints all the way to the waypoint where I want the friendly fighters to disengage, and I've attached the corresponding interceptor waypoints to the target bomber flight's waypoints with the 'Target ---> Set' button'.

Because the 'Target ---> Set' button is context sensitive, it attaches the interceptor element to the target bomber flight just like when we attached the escorts, but instead of
escorting the bombers, the interceptors will attempt to shoot the bombers down.
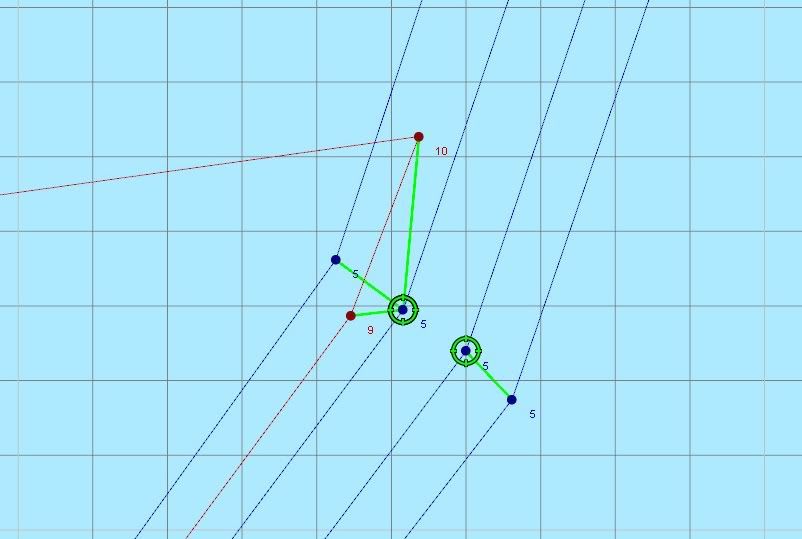
Here's a variation of the 'extra waypoint' trick we employed with the escorts - I've added a short extra waypoint where I want the interceptors to disengage to ensure they press their attack until the end. You know the drill, run a test mission at 8x speed.
Tip: the autopilot is
excellent for test missions. Although you're not going to want to 'play' on autopilot ( our mission is WAY too interesting for that!

) the autopilot gives you an excellent baseline to check your player's waypoints in your high-speed test missions.

Here, I've added an interceptor element for the second bomber flight, and another interceptor element for one of the enemy escort elements. The remaining escort element is for the player to engage! Guess what's next - run a test mission!

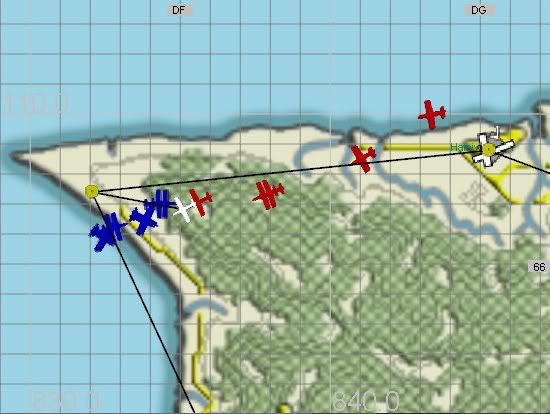 Here's a tip:
 The in game mini-map is an excellent tool to veiw your 'fast-forward' test missions. The 'pattern' of a mission is really obvious in the mini-map with the time accelerated. This grab of the mini-map is the moment we've been working so hard towards...

The end of another successful test - hang in there, this mission is almost done!

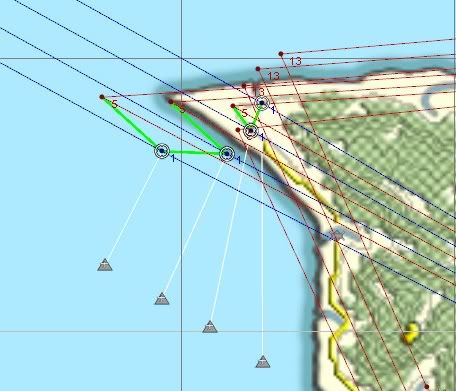
To finish the mission we just need to add our Target Objectives. I deleted the previous objectives that were attached to the bombers, and substituted primary target objectives attached to each of the enemy bomber flights and escort elements (four in total - all four will need to be acheived to complete the mission). We only need to attach a target objective to one waypoint from each target, anywhere on the target's flightplan. I've set a timeout of 30 mins and 50% destruction for the fighters, and 75% destruction for the bombers. If the good guys can shoot down two bombers and one fighter from each flight within 30 minutes, we'll win the mission. I'm invested in the performance of the friendly AI because I can't win without them, and I'll be motivated to help them out if I can.
Note: We don't have to attach the
player's waypoints to the target, or even plot corresponding waypoints the way we did for the AI interceptors. The player only needs the base flight plan waypoints - unlike the AI, the player can fly the combat part of the mission himself,
without waypoints. We hope!

Time for a seat-of-pants test flight... this time in the cockpit where we belong!
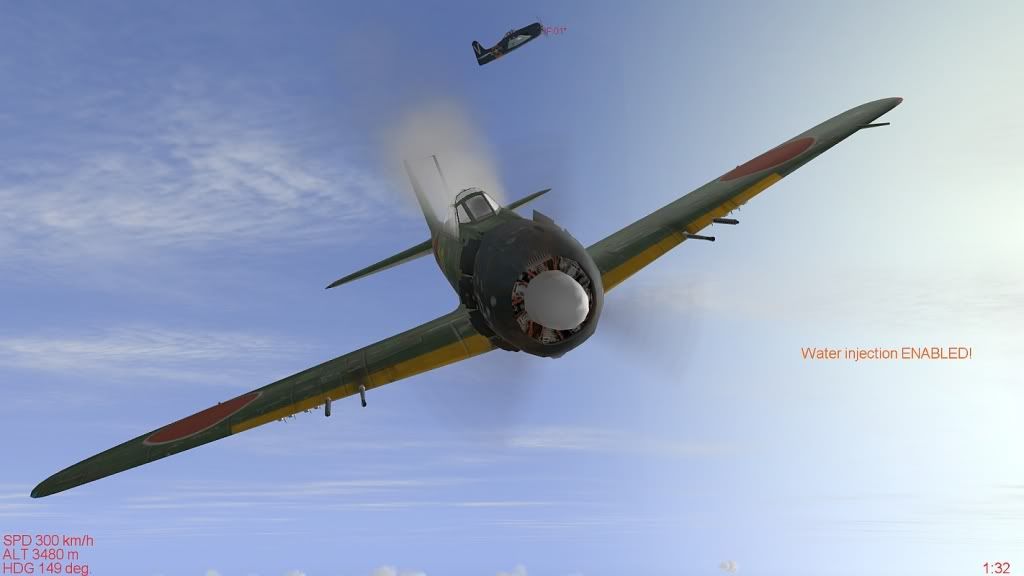
Pilot kill on this bad guy.
Tip: Quick recording NTRKs are great for reviewing the action in a test flight where you fly the mission yourself, I've got mine mapped to keyboard 'Q' in my controls menu. You can swap views to other aircraft in the mission - Shift-F2 for friendlies and Ctrl-F2 for the bad guys. Icons ( 'aircraft labels' ) are handy for sorting out who's who.
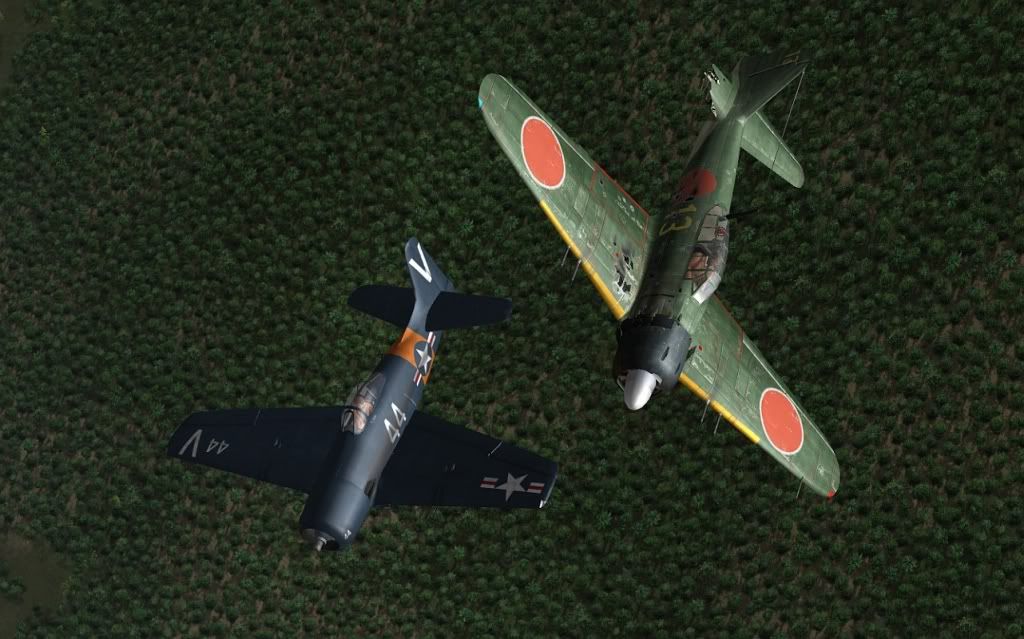
The mission flies great! Lots of action around the player, nice balance, and a nice sense of accomplishment when you finally touch down again at home plate. This is a mission I'll
want to fly again.

Let's review the points on offer again:
Primary Objective: shoot down the target enemy fighters and bombers - 50 points each (200 total)
Secondary Objective: landing back at base - 50 points
Hidden Objective: taxi to the correct hangar - 100 points
... and you'll also score points for every enemy aircraft you shoot down - 100 points each (per engine).
On this test I bagged a Zero from the target element, and my wingie got the other one to win a 'Primary Target: Complete' for my team. I also scored another Zero while helping out the friendly interceptors for a total score of 550 points. Nice.

Here's some really handy info about points and scores from Gamekeeper over at M4T:
http://www.mission4today.com/index.php?name=Knowledge_Base&op=show&kid=173And that's about it. Write a nice briefing, and this mission is done. That went pretty well, so what's the 'other' method we mentioned for setting up bombers? For want of a better term again, lets call it the 'individual flight' method:
PART THREE: 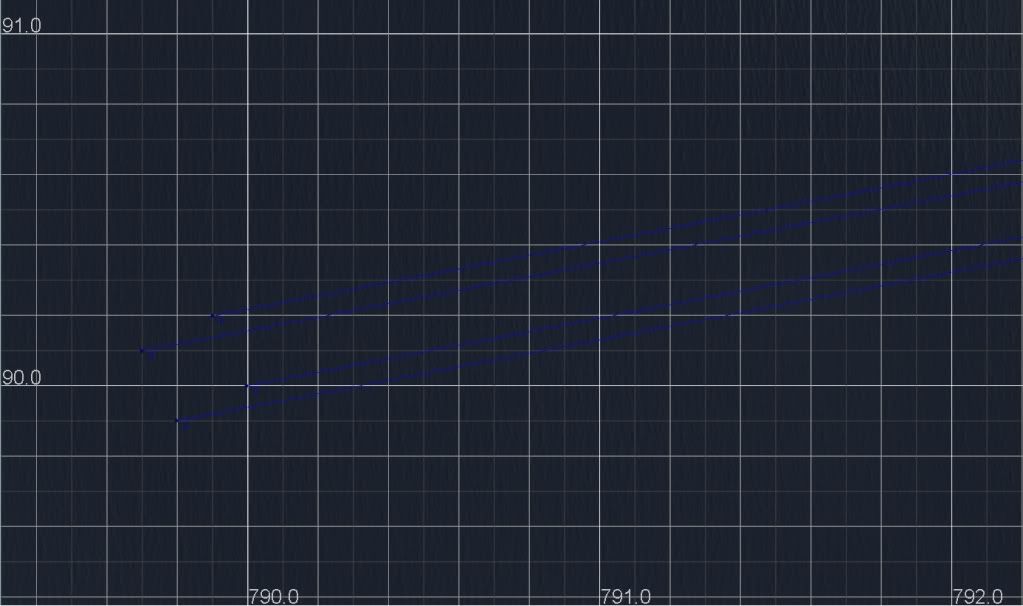
Open 'Battle of Wheeler Field_01' and save it as a new mission again:
'Battle of Wheeler Field_03'. Delete the bomber flights from '01'.
This time each bomber flight is going to consist of just
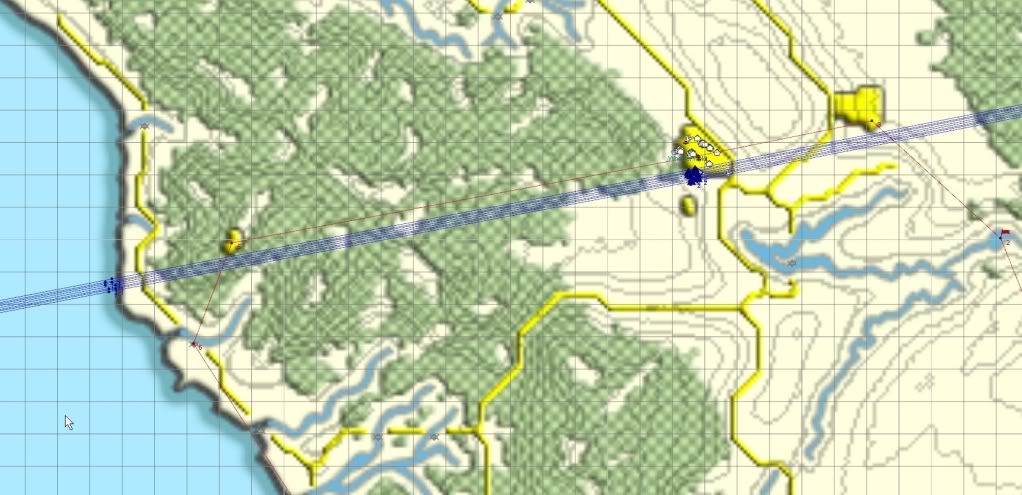
one plane. Then we build up our bomber formation one plane/flight at a time. Here are four flights of one plane each, in a roughly square/diamond formation, representing the beginning of a 'Combat Box' or 'Bomber Stream' (at least a simplified version for this example -there are some links for historic formations below). Using the grid is an easy way to space out the formation: on this scale the grid is 100 metres.
(Sorry the map image is not so good - it was clear enough on my monitor, but once it's been screen-captured and posted at photobucket it's a bit hard to make out the waypoints. If you squint your eye's a bit you'll be ok I hope. If not, let me know and I might be able to do a false color version of the image or something.)
Because my formation is lined up on the grid but is
not on a cardinal heading, I get a little bit of 'echelon' between planes which I think looks realistic, and also helps to avoid the case of one aircraft's bombs hitting another. If the course
was on a cardinal heading I'd probably adjust my waypoints manually a little bit to preserve the echelon - but
you're the mission designer right?
Tip: Check-fly the mission when you plot the
first plane,
before you add all the other planes in the bomber stream - it's much easier to adjust the flight-plan for
one plane. Once you're happy with the timings for the first plane, go ahead and add the rest: their timing will be bang on too.

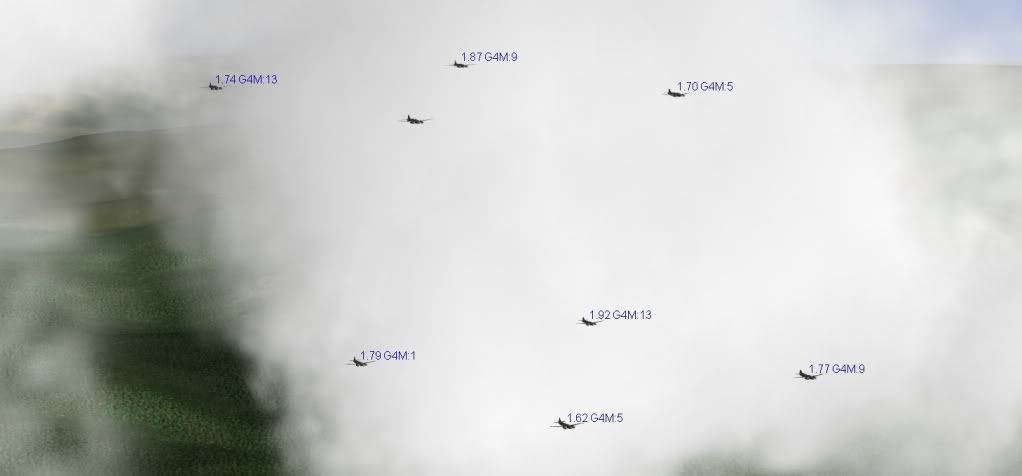
Next I've added another 'stack' to make a three dimensional eight-ship 'Combat Box'. The top four planes are also echeloned a little to help avoid collisions and accidents.
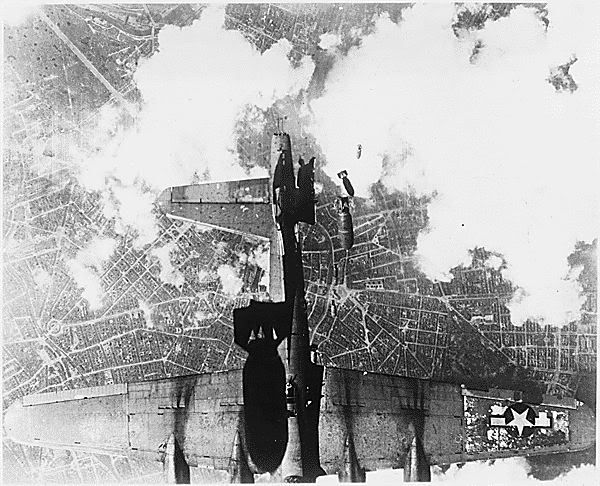
Here's why a little bit of echelon is not a bad idea! Hope this crew made it home...
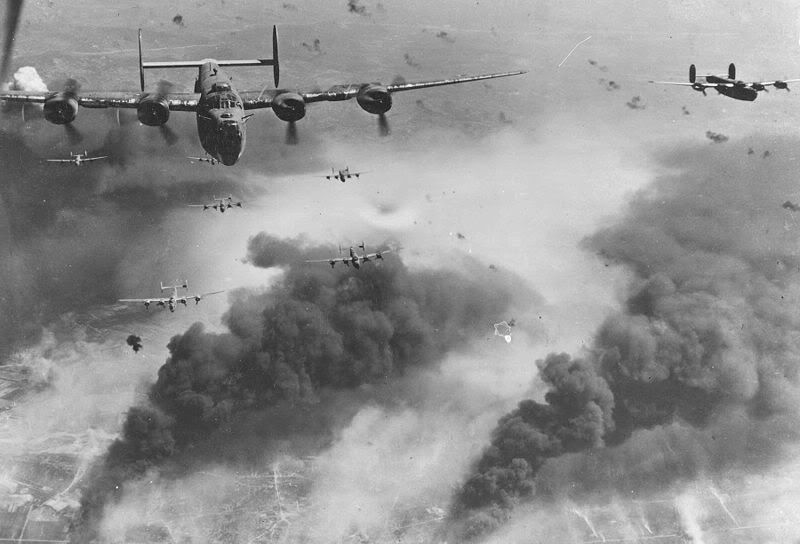
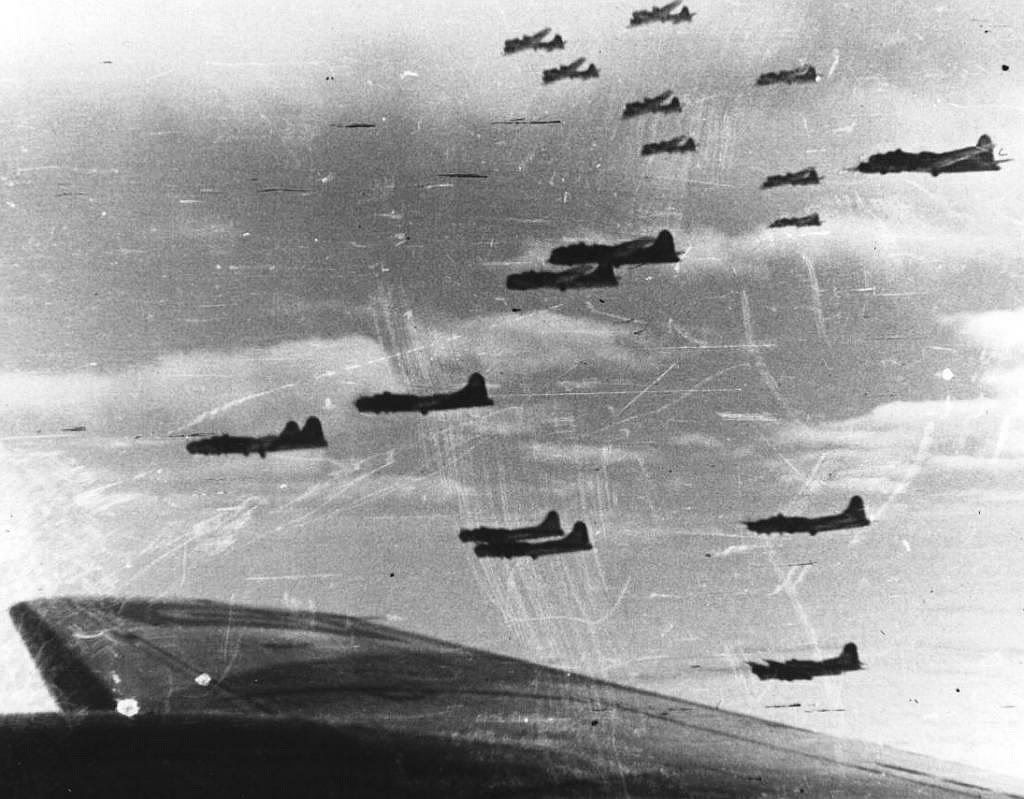
What are the advantages of the 'Individual Flight' method? For one thing, our formations are now extremely flexible. You can study historical 'box' formations for example, and then replicate them in your mission with careful vertical and horizontal spacing of your waypoints in three dimensions. Another advantage is that your bombers will easily keep station without colliding or pulling dumb-ass maneuvers to maintain the AI formation. And if a bomber is hit, it will drop out of formation without leading his 'wingmen' down to the hard deck.
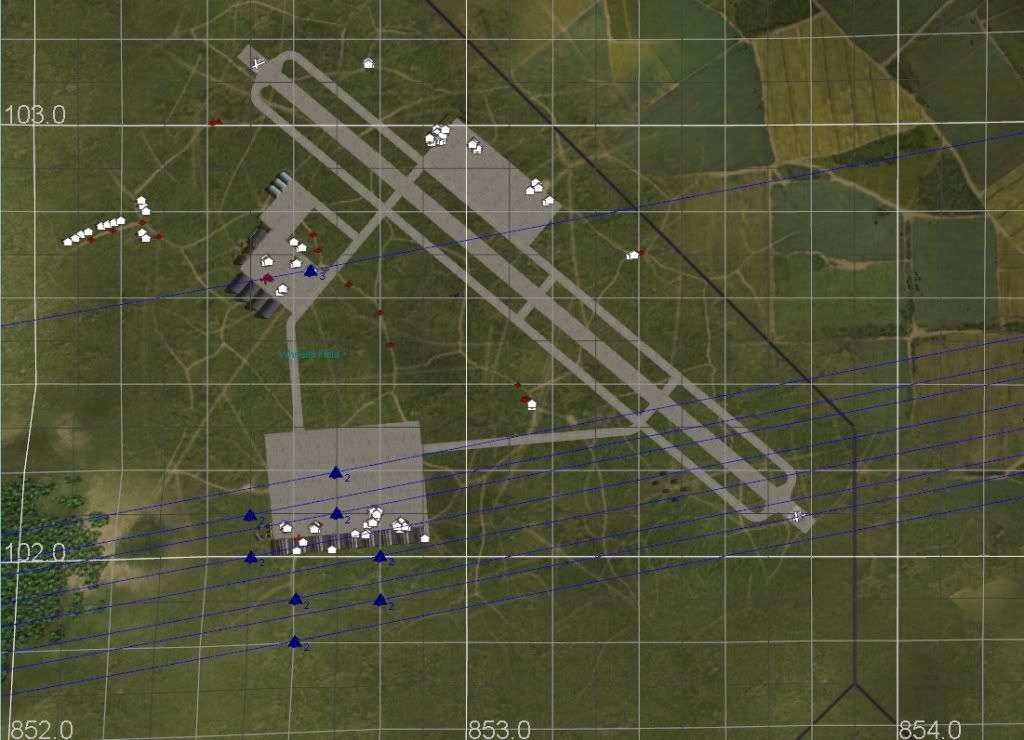
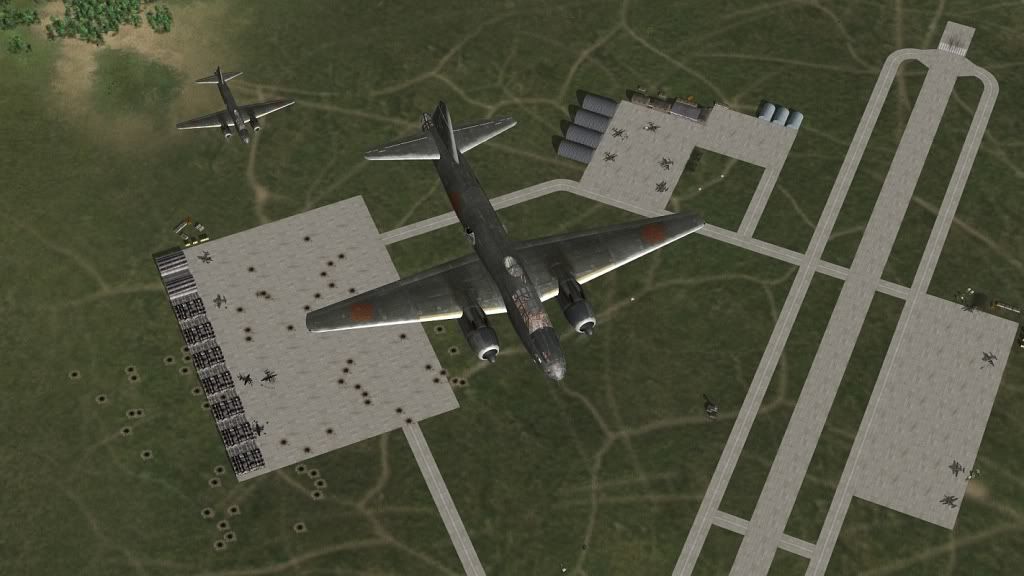
We can also spread our GATTACK waypoints to fully cover a target. You can get up to 16 aircraft for each 'named' squadron (4x 'numbered' squadrons multiplied by four 'numbered' flights each). Of course, you can use as many squadrons as you like for formations larger than 16 aircraft.
Once the bomber stream is set up, we don't have to do too much more to build an interesting mission. All I've done here is plot a course for the player's flight that intercepts the bomber stream, in this case with a only few minutes to try and shoot down the bombers before they hit Wheeler Field.

These combat boxes are a pretty tough proposition. I added two Bearcats (average skill) to my flight, and found our four-ship had a fair chance of dealing some damage to the combat box before they got to Wheeler Field.
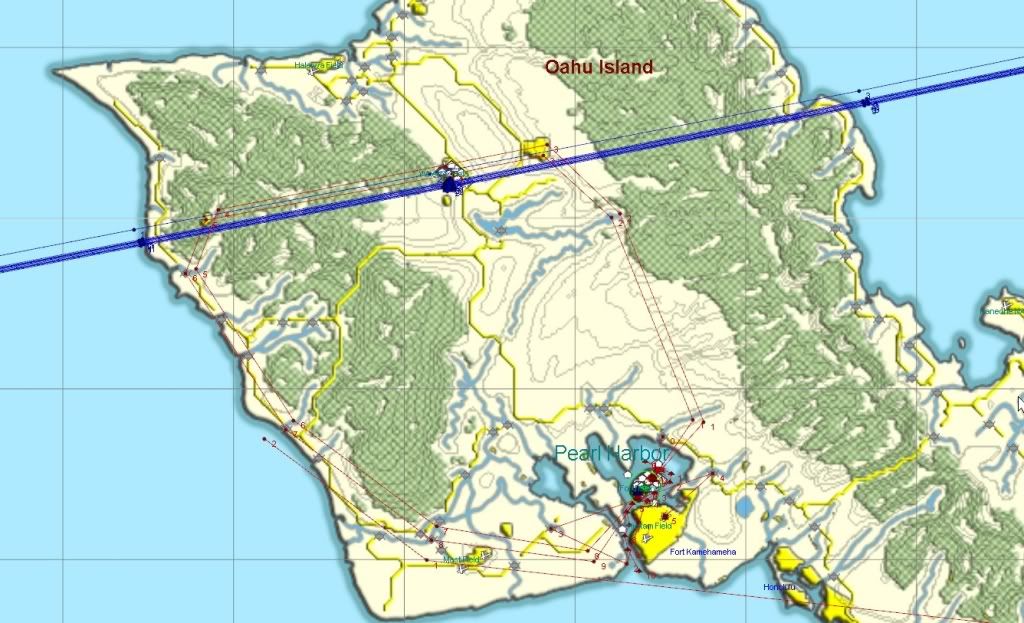
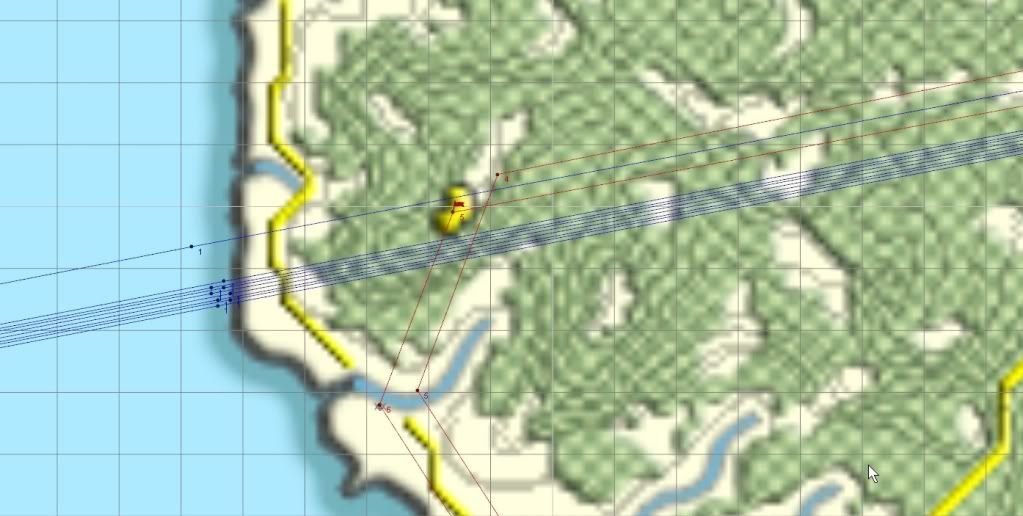
Let's finish building this mission. Here, I've added an element of two Japanese escort fighters, and an extra element of two freindly fighters so that I have some tactical flexibility to deal with them. For example I could order my main (Red) flight to attack the bombers while the extra element keeps the escorts occupied, or I could order split Red flight and order two AI elements to go after the bombers while I take on the escort with my wingman.
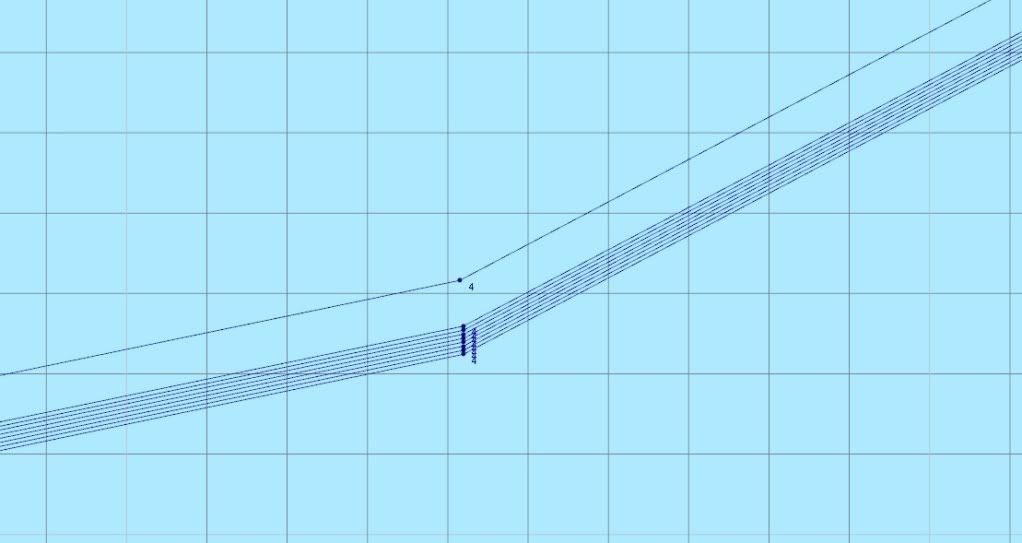
A couple of gentle turns are all that are needed to set up a convincing 'bomber stream' effect, and on smaller maps the bomber stream can simply cross the map from one side to another.
It would be impractical to attach the escort and interceptor waypoints to eight 'Individual Flights' of bombers - the 'Standard' mission building method (as in Part Two) is superior in this regard. However, if we carefully plot our flightplans and timings to ensure the escorts and interceptors fly within visual range of their 'targets' (usually about 5kms will be close enough) the standard AI combat routine will probably be sufficient to initiate combat, and of course freindly AI can be controlled with the player command menu in-game (as long as the AI is from the same squadron/regiment). To make
absolutely sure an engagment takes place the AI escort waypoints could be attached to an interceptor flight, but this mission test played perfectly as is.
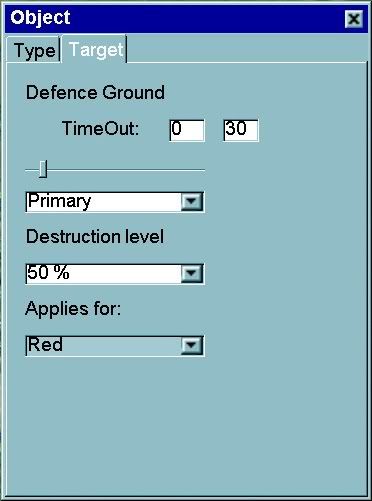
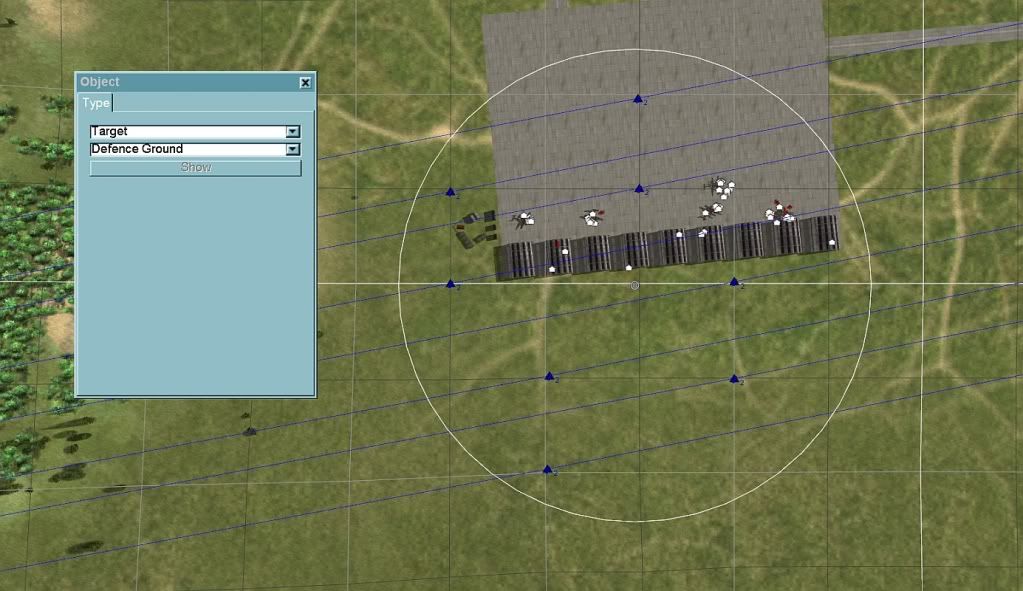
Likewise, it would be cumbersome to plot eight DESTROY Target Objectives to the individual bomber flights. Fortunately, we have another method on hand to build an interesting mission objective.
The DEFEND GROUND primary target objective is plotted like the RECON objective from our earlier missions. It covers an area of ground, the diameter of which is set with the slider. In the case of the DEFEND GROUND objective, if the bombers destroy the specified percentage of Stationary Objects (Stationary Vehicles, Stationary Planes, Staionary Ships etc but NOT ordinary objects like airfield equipment and buildings) before the Time Out, the player will LOSE the mission. If the bombers do NOT destroy the prescribed Stationary Objects, the player WINS. Perfect for this mission!
More Target Objective Tips: 1. DEFEND GROUND can be a primary, secondary or hidden objective, as is the case with all the target objective types, and your choice will make a difference to how the mission plays out.
2. DESTROY GROUND is the opposite objective for when your mission includes
friendly bombers. If the the prescribed percentage of stationary objects in the target area are destroyed the player WINS the objective. If the stationary targets are NOT destroyed the player LOSES the objective.
3. All stationary objects that score points count towards the DEFEND GROUND and DESTROY GROUND objectives. You can add or remove stationary objects to balance the difficulty of the objective and the mission. Refer here:
http://www.mission4today.com/index.php?name=Knowledge_Base&op=show&kid=1734. For moving objects (vehicles, tanks, ships etc) the DESTROY target objective is preferable, and works particularly well with vehicle columns. Attach a DESTROY target objective to each vehicle or column and set a destruction percentage. Remember for individual vehicles (not columns) you must set 100% destruction because damage to individual objects is not scored - you only score when an individual object is
destroyed. For a column of four vehicles, 50% destruction is scored when two vehicles are totally destroyed (but not when they are only damaged). Moving vehicles can screw-up the scoring for DEFEND/DESTROY GROUND target objectives if the vehicles move in-to or out-of the target area during the mission: the number of valid targets inside the target area when the mission
starts is how the objective is scored, so if half the targets then bugger off somewhere else you may have trouble winning the objective! To keep things simple, moving targets=DESTROY, stationary targets=DESTROY/DEFEND GROUND. The DESTROY objective will tend to give your mission a higher score (especially with individual moving objects) because you score 50 additional points for each extra target objective.
5. DESTROY/DEFEND BRIDGE target objectives are similar to their 'GROUND' cousins, but only apply to bridges (doh!) and do not have a destruction percentage field. Bridges make
great targets!
6. The ESCORT target objective is the opposite to the DESTROY objective we employed for the Japanese bombers. Where the mission is to defend friendly flights of bombers, attach an ESCORT objective to each bomber flight. The destruction setting determines how many bombers need to survive in order to win the mission. If the flight is a three-ship and the destruction field is 50% - the player LOSES the objective if
two bombers are shot down, and if only
one bomber is shot down the player WINS the objective. If the player is escorting individual flights of bombers - use the DESTROY GROUND objective instead: if enough bombers survive to take out the target the player WINS the objective.
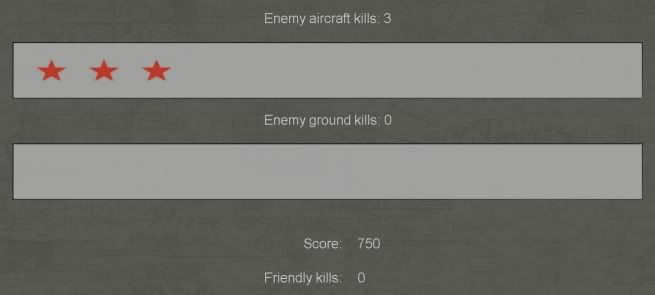
OK. So let's wrap up this mission. It's really exciting to play and their are plenty of points on offer: 200 for each twin engine bomber(100 per engine, 600 total on this occasion), 50 for the secondary landing objective and 100 for actually
surviving the landing and taxiing back to get your ass chewed out by the chief. Only three bombers made it thru, but they still managed to take out the ground objects, so I think I need to add a few more objects to get the balance right, the player's side
ought to get a mission complete for shooting down over half the bomber force. But, it's a good start for a very nice mission.

So then, what are the
dis-advantages of the 'Individual Flight' method? The main one is that it's more work - although not as much as it might seem at first. The
first plane is still the one that takes the most work to set up. After that (with practice) it's quite easy to lay out the waypoints for the other planes in the same 'package'. And some of the tedious work, like correcting any screwups in your waypoint speed and altitude settings, can be done directly in the .mis file.
See if you can spot the error:[Wing]
ja0100
UN_NN00
UN_NN10
UN_NN11
IJA_F_C_1z01
IJA_F_C_1z02
IJA_F_C_1z03
IJA_F_C_1z00
IJA_F_C_1z10
IJA_F_C_1z11
IJA_F_C_1z12
IJA_F_C_1z13
[ja0100]
Planes 3
Skill 1
Class air.G4M1_11
Fuel 100
weapons 8x100
[ja0100_Way]
NORMFLY 194750.13 77419.72 1700.00 300.00 &0
NORMFLY 232556.45 57382.82 1700.00 300.00 &0
NORMFLY 245283.22 51255.36 1700.00 300.00 &0
GATTACK 252639.41 52664.09 1700.00 300.00 &0
NORMFLY 261224.49 54277.69 1700.00 300.00 &0
NORMFLY 275165.47 72955.70 1700.00 300.00 &0
NORMFLY 283785.84 98326.27 1700.00 300.00 &0
[UN_NN00]
Planes 2
Skill0 1
Skill1 0
Skill2 1
Skill3 1
skin0 zsf-f8f-V44-nas.glenview-1947.bmp
skin1 zsf-f8f-P17-nattu-pensacola-1949.bmp
noseart0 Queen_Of_Hearts.bmp
noseart1 Swell_Time.bmp
numberOn0 0
numberOn1 0
Class air.F8F2
Fuel 100
weapons default
[UN_NN00_Way]
TAKEOFF 264614.19 34787.87 0 0 &0
NORMFLY 266944.07 38197.94 300.00 300.00 &0
NORMFLY 262149.35 50045.91 1000.00 400.00 &0
NORMFLY 257830.93 54117.01 1000.00 400.00 &0
NORMFLY 245294.39 58806.58 1700.00 300.00 &0
NORMFLY 232071.73 57417.46 1000.00 400.00 &0
NORMFLY 237034.13 46750.33 1000.00 400.00 &0
NORMFLY 243105.66 37638.03 1000.00 400.00 &0
NORMFLY 251619.41 31179.53 1000.00 400.00 &0
NORMFLY 261153.65 29905.03 1000.00 400.00 &0
LANDING 263675.31 33656.92 0 0 &0
[UN_NN10]
Planes 3
Skill 1
Class air.F4U_4
Fuel 100
weapons default
[UN_NN10_Way]
NORMFLY 265177.74 37235.91 50.00 400.00 &0
NORMFLY 263792.37 32199.55 50.00 400.00 &0
NORMFLY 263048.70 29767.51 300.00 400.00 &0
NORMFLY 258624.10 31827.06 300.00 400.00 &0
NORMFLY 268097.47 35082.87 300.00 400.00 &0
LANDING 265307.03 32566.46 0 0 &0
[UN_NN11]
Planes 2
Skill 1
Class air.F4U_4
Fuel 100
weapons default
[UN_NN11_Way]
NORMFLY 296199.04 24994.04 2000.00 300.00 &0
NORMFLY 251359.58 29971.23 2000.00 300.00 &0
NORMFLY 241801.44 37328.12 2000.00 300.00 &0
NORMFLY 235887.46 46376.00 2000.00 300.00 &0
[IJA_F_C_1z01]
Planes 1
Skill 1
Class air.G4M1_11
Fuel 100
weapons 8x100
[IJA_F_C_1z01_Way]
NORMFLY 189997.25 39999.35 1750.00 300.00 &0
NORMFLY 234800.65 48597.81 1750.00 300.00 &0
GATTACK 252800.39 52001.79 1750.00 300.00 &0
NORMFLY 277203.16 56798.57 1750.00 300.00 &0
NORMFLY 304200.02 62399.71 2100.00 300.00 &0
NORMFLY 397998.87 111796.10 1750.00 300.00 &0
[IJA_F_C_1z02]
Planes 1
Skill 1
Class air.G4M1_11
Fuel 100
weapons 8x100
[IJA_F_C_1z02_Way]
NORMFLY 189900.15 40197.49 1750.00 300.00 &0
NORMFLY 234699.76 48797.31 1750.00 300.00 &0
GATTACK 252698.11 52195.85 1750.00 300.00 &0
NORMFLY 277098.05 57000.36 1750.00 300.00 &0
NORMFLY 304197.51 62597.61 1750.00 300.00 &0
NORMFLY 397999.50 111999.42 1750.00 300.00 &0
[IJA_F_C_1z03]
Planes 1
Skill 1
Class air.G4M1_11
Fuel 100
weapons 8x100
[IJA_F_C_1z03_Way]
NORMFLY 189699.41 40098.36 1750.00 300.00 &0
NORMFLY 234499.41 48695.02 1750.00 300.00 &0
GATTACK 252499.57 52096.83 1750.00 300.00 &0
NORMFLY 276901.77 56898.89 1750.00 300.00 &0
NORMFLY 304199.37 62546.62 1750.00 300.00 &0
NORMFLY 397998.06 111951.12 1750.00 300.00 &0
[IJA_F_C_1z00]
Planes 1
Skill 1
Class air.G4M1_11
Fuel 100
weapons 8x100
[IJA_F_C_1z00_Way]
NORMFLY 189797.81 39899.64 1750.00 300.00 &0
NORMFLY 234601.46 48499.14 1750.00 300.00 &0
GATTACK 252604.51 51902.38 1750.00 300.00 &0
NORMFLY 276998.14 56700.67 1750.00 300.00 &0
NORMFLY 304198.47 62349.24 1750.00 300.00 &0
NORMFLY 398001.07 111747.03 1750.00 300.00 &0
[IJA_F_C_1z10]
Planes 1
Skill 1
Class air.G4M1_11
Fuel 100
weapons 8x100
[IJA_F_C_1z10_Way]
NORMFLY 190001.63 39897.04 1950.00 297.50 &0
NORMFLY 234800.25 48498.99 1950.00 297.50 &0
GATTACK 252800.10 51899.55 1950.00 297.50 &0
NORMFLY 277200.44 56700.43 1950.00 297.50 &0
NORMFLY 304200.73 62298.39 1950.00 297.50 &0
NORMFLY 397999.39 111699.58 1950.00 297.50 &0
[IJA_F_C_1z11]
Planes 1
Skill 1
Class air.G4M1_11
Fuel 100
weapons 8x100
[IJA_F_C_1z11_Way]
NORMFLY 189902.46 40095.39 1950.00 297.50 &0
NORMFLY 234700.67 48693.01 1950.00 297.50 &0
GATTACK 252699.35 52100.77 1950.00 297.50 &0
NORMFLY 277098.98 56899.53 1950.00 297.50 &0
NORMFLY 304201.60 62498.75 1950.00 297.50 &0
NORMFLY 397998.87 111898.36 1950.00 297.50 &0
[IJA_F_C_1z12]
Planes 1
Skill 1
Class air.G4M1_11
Fuel 100
weapons 8x100
[IJA_F_C_1z12_Way]
NORMFLY 189695.61 39999.05 1950.00 297.50 &0
NORMFLY 234499.56 48601.87 1950.00 297.50 &0
GATTACK 252500.14 52000.07 1950.00 297.50 &0
NORMFLY 276899.98 56798.30 1950.00 297.50 &0
NORMFLY 304201.90 62446.83 1950.00 297.50 &0
NORMFLY 397997.03 111847.03 1950.00 297.50 &0
[IJA_F_C_1z13]
Planes 1
Skill 1
Class air.G4M1_11
Fuel 100
weapons 8x100
[IJA_F_C_1z13_Way]
NORMFLY 189797.62 39800.70 1950.00 297.50 &0
NORMFLY 234598.63 48400.81 1950.00 297.50 &0
GATTACK 252602.80 51803.78 1950.00 297.50 &0
NORMFLY 276999.93 56599.51 1950.00 297.50 &0
NORMFLY 304201.16 62248.69 1950.00 297.50 &0
NORMFLY 397995.83 111652.88 1950.00 297.50 &0
A much less obvious disadvantage is that within the 'standard' AI formations there is some natural 'drift' that looks quite attractive in-game - the aircraft 'bob around' just a little bit. You won't get the same effect in a formation of individual flights, their station-keeping is just a little
too perfect. If you like, you can add a smidgen deliberate error in your waypoint speed and altitude settings to reduce that 'mindless drone' effect a bit (I'd probably adjust the speed a tiny bit - adjusting the altitude will tend to produce a 'pop-up' effect - but - see the Secret Tips below).
Something to watch out for is that because of the way the game engine handles speed and altitude settings, aircraft with the same speed but different altitude settings will very slowly drift apart. This isn't entirely all bad because it reduces that 'perfect' station-keeping effect a bit. If it's
too excessive in a long mission, you may need to correct for it in your waypoint settings (see the Secret Tips again).
The other disadvantage is that the DESTROY target objective (for interceptors) doesn't work so well with the 'Individual Flight' method. Instead, you could give each individual flight an independent hidden target objective, or you could use a different objective, like say DEFEND GROUND (as we've done in our example above).
Tip: For a
really large formation, you can combine
both methods in the
same formation. An eight flight combat box (or 'wing') with three bombers per flight for example, is going to be pretty impressive if your computer can handle it. Your formation will of course have all the pros and cons of both methods -
c'est la vie... Anyway, here's a pretty good, basic article on combat boxes and a cross-reference - I think you'll be fairly convinced our methods are not far off how it was done
for real back in the day!
http://en.wikipedia.org/wiki/Combat_boxhttp://www.398th.org/Research/8th_AF_Formations_Description.htmlSecrets you need to know to keep your bombers in formation: 1. The higher an aircraft is, the faster it will fly for the same waypoint speed. In our example combat box, the upper stack is 200m higher. To keep the formation together we need to set their waypoint speed about 2-3km
slower (297 kph) to keep the formation together. You can try this rule of thumb yourself: 1-1.5kph slower speed per 100m altitude. Your mileage may vary. In fact in this example mission, I made a final edit (297.5 kph) do get it
just right in the game over the entire course of the bomber stream - editing the .mis file in Windows Notepad is a really good place to do this sort of final fine-tuning and trouble-shooting. Oftentimes an error will be
more obvious in the .mis file than it is in the FMB.
2. Waypoint altitude is 'above ground level'. So, if you plot the waypoints for your formation over hilly or mountainous terrain, your waypoints in-game will reflect the elevation of the terrain below. Try to plot your formation waypoints over level terrain.
3. Your aircraft fly with the settings of the waypoint they are flying
towards - the
next waypoint in other words.
4. Make sure your bombers stay in the 'bomber stream' until after the mission ends - in other words: make sure the bomber route is long enough for the player to finish the mission and get home and land, have a Bourbon and smoke, tell the missus... If you
don't, your bombers will all orbit in place at the last waypoint and you'll probably get those immersion killing mid-air collisions you worked so hard to avoid in the first place. If you
do want your bombers to orbit, make sure they
all have both vertical and horizontal separation: if your bombers are stacked
and staggered you should be able to avoid mid-air smashes.
5. Make sure
all the bombers in the stream have the same load-out, fuel level, skill level -
any differences between the bombers in the stream will increase the 'drift' of your formation once you get in-game.
6.
Any sort of combat action will probably disprupt your carefully planned formation. Deal with it... it was the same in real life. At least no one is shooting at you!

With a bit of practice you can set up some really attractive maneuvers with these big ol' lumbering beasts ('cross-over' turns are pretty cool for example!). Check out these C-47s in an old 'Berlin Airlift' mission:


Not very realistic maybe... but very pretty...
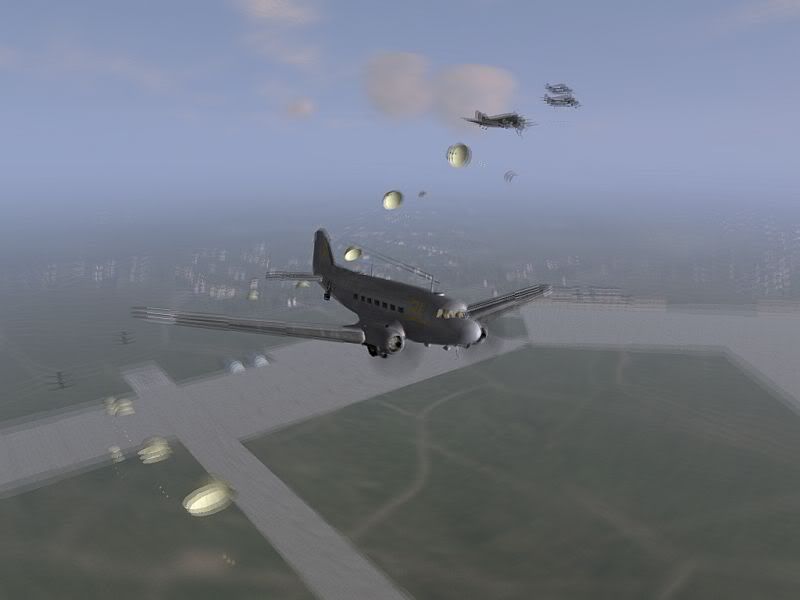
Go the Candy Bombers! BTW: you set up transports to drop paratroops and supplies exactly the same as level bombers - just make sure you have enough altitude for the chutes to deploy (you can get down as low as about 100-200m IIRC).
That's everything I wanted to show you about building level bombers into your missions. I hope you found this tutorial informative and entertaining - I learned a few new tricks myself researching it. Next up are dive-bombers and fighter-bombers, some of my favourite missions. In the words of Flying Nutcase: 'Have a great day!'

Kiwi
FMB Tutorial - Home
 Author
Topic: FMB Tutorial 07 - Level Bombers, Escorts and Interceptors (Read 16836 times)


