Special Aircraft Service

Please login or register.

Login with username, password and session length
Advanced search  
Pages: 1 ... 4 5 6 [7] 8 9 10 ... 12   Go Down

Author Topic: Bedford OXC and Queen Mary trailer. Second part of the recovery set build.  (Read 15949 times)

0 Members and 2 Guests are viewing this topic.

Atoka220

  • Bomber
  • Modder
  • member
  • Offline Offline
  • Posts: 804
Re: Bedford OXC and Queen Mary trailer. Second part of the recovery set build.
« Reply #72 on: December 22, 2022, 03:37:07 AM »

Jeez, the detail is superb
Very nice job Pete
Logged
There are 2 certain things in life: Death and CTDs

Mission_bug

  • Modder
  • member
  • Offline Offline
  • Posts: 6062
Re: Bedford OXC and Queen Mary trailer. Second part of the recovery set build.
« Reply #73 on: December 22, 2022, 06:06:30 AM »

Glad you like it so far Atoka220, it is a interesting pastime trying to fathom how it all goes together. 8)

Here are a few more images form what little time I had this week, not the cab as I said but wheels. ;)

I tried to adapt the existing Thorneycroft front wheels to this and the rim seemed a little deeper so
besides reducing the diameter I also pushed in a few faces:


Here trying to replicate the hub detail with some new build items:


I used clones of the front for the back and adjusted the texture I already had so here is the chassis with them:


When I first added these in game I had a odd looking see through effect with them that at certain angles would
show the rims through the tire!  It took me days to figure out but I sorted the problem eventually. In the 3d program
all was okay as I had checked everything was the right way, cleaned up some surplus polgons and applied the X-form
thingy but still the show through it was baffling.

So, what was it then I can hear you say?

I had renamed the wheel textures and some of the mat files, however, I had not opened up the base 6 mat to change that
name in there to my new texture. I decided to revert back those I already altered to their original name and all was okay
again. :o

Moral of that is if they worked fine with the original titles just leave as is or take more care if you do rename them. :D

I need to make a new hub for the back and add some bolts and maybe then I will finally start the cab I promised. :angel:

Take care and be safe.

Wishing you all the very best, Pete. ;D
Logged

Yaro59

  • member
  • Offline Offline
  • Posts: 887
Re: Bedford OXC and Queen Mary trailer. Second part of the recovery set build.
« Reply #74 on: December 22, 2022, 08:33:10 AM »

 You possess great patience and skill Pete.  ]notworthy[
It looks as if the chassis of this car left the assembly line a while ago.

               Congratulations and much health  ]thumright[
Logged

Mission_bug

  • Modder
  • member
  • Offline Offline
  • Posts: 6062
Re: Bedford OXC and Queen Mary trailer. Second part of the recovery set build.
« Reply #75 on: December 22, 2022, 12:18:06 PM »

You possess great patience and skill Pete.

Yes Yaro, it can test your patience getting this involved, thankfully I have that and I am in no rush to finish, that said I would hope I do not take too long. ;)

Hope you all like following this and learning from my mistakes.

Take care and be safe.

Wishing you all the very best, Pete. ;D
Logged

stanislao

  • Modder
  • member
  • Offline Offline
  • Posts: 1595
Re: Bedford OXC and Queen Mary trailer. Second part of the recovery set build.
« Reply #76 on: December 23, 2022, 06:50:10 AM »

 ;D  Your mania for the minutest details really makes me rejoice! ;)

Logged

Mission_bug

  • Modder
  • member
  • Offline Offline
  • Posts: 6062
Re: Bedford OXC and Queen Mary trailer. Second part of the recovery set build.
« Reply #77 on: December 24, 2022, 09:08:46 AM »

;D  Your mania for the minutest details really makes me rejoice! ;)


Thanks Stan, I have spent a life in manufacturing from electric trains to boilers, with trucks and many other things also,
and have machined, fabricated, fitted and painted all kinds of crazy shapes and designs so have an idea how it all is made. ;)

when I see photographs of these machines I get a little carried away and so my models get all that experience of years of making
stuff put into them, I need to behave and simplify my builds. o_O

Others here in the forum fill in my knowledge gaps and you guys then have to suffer my elongated build process where I try to
capture all that detail for you and that just goes on and on and .......   :D

It keeps me out of mischief, sort of. :angel:

Take care and be safe.

Wishing you all the very best, Pete. ;D
Logged

stanislao

  • Modder
  • member
  • Offline Offline
  • Posts: 1595
Re: Bedford OXC and Queen Mary trailer. Second part of the recovery set build.
« Reply #78 on: December 25, 2022, 04:08:01 AM »


 ;D  As you well know, I fully share your passion for detail, but now have a nice, peaceful Christmas and get lots of pampering!  May next year bring us many more positive surprises!   ;)

Logged

Mission_bug

  • Modder
  • member
  • Offline Offline
  • Posts: 6062
Re: Bedford OXC and Queen Mary trailer. Second part of the recovery set build.
« Reply #79 on: December 25, 2022, 07:16:03 AM »

All the best to you stanislao as well as family and friends, I hope you all have a great Christmas and New Year. ;)

Take care and be safe.

Wishing you all the very best, Pete. ;D

Logged

Mission_bug

  • Modder
  • member
  • Offline Offline
  • Posts: 6062

Hello again guys, yes it has been a while since I last posted but here we go. ;)

Time is always against me and sadly this project is left to gather dust on a regular basis because I have other
priorities I need to attend to, however, it is still in progress even if very slowly. :o


Okay then, so we started to develop the details for the front wheels with the small hub and now I made use of
existing geometry to make a start on the wheel outer nuts:


Further developing gives us the inner set of nuts and bolts and something to try and replicate the valve for adding
the air into the tyre:


I decided to bulk out the small hub, on looking again at photographs it seemed too small so I enlarged it and all
the work so far was mapped to the template, the nuts and bolts were already done from previous use but the
hub had needed to be mapped anew:


Here the paint is on:


On to the rear wheels, again a new hub was required but the front nuts were cloned and had their mapping
put elsewhere on the template. The smaller nuts and bolts were again from a previous made part that was
cloned each time to surround the outer hub:


The detailing of what fixes the rear wheel to the main hub was made, not as intricate as the real thing as really
there were milled edges that gave the necessary clearance for the rim to fit over and locate:


The new parts were mapped and painted and the existing reused stuff had the mapping again moved to somewhere
else on the template and all was painted:


Finished parts cloned for the opposite side of the chassis as well and so completed:


And finally, the bit I like best of all, adding the new meshes into the sim to see what they look like:


And there we are for the time being, until the next instalment of this ongoing saga. :D


Take care and be safe.


Wishing you all the very best, Pete. ;D
Logged

cgagan

  • SAS Team
  • member
  • Offline Offline
  • Posts: 5807

Work of art... 8)
Logged

Mission_bug

  • Modder
  • member
  • Offline Offline
  • Posts: 6062

Work of art... 8)

Thanks for the kind words Costas, glad you like it. 8)


I've set up the bounding box again for the next time I get a chance to tinker:


Every vehicle be it a Hawker Hurricane, Porsche 911 or a Ford Transit has a very distinct style to the bodywork,
this Bedford is no exception and any artist be it in 3d, with pencil or paint will I think always approach this with
some trepidation as the purists can spot ever so slight defects in what you try to replicate unlike the chassis
the bodywork is so distinctive that getting it right is a trial in itself:


Anyway, I cannot put it off forever, I need to try sometime so this is where I will continue when I next have
some time to spend on it. ;)

There is still a lot of detail to add to the chassis but for now it can remain as is as I try and add the cab and
the wheel arches to try and capture its own particular look.


Until next time, take care and be safe.

Wishing you all the very best, Pete. ;D
Logged

Mission_bug

  • Modder
  • member
  • Offline Offline
  • Posts: 6062

Hello again guys, it has been a while now but I needed to get a few things done and now I am back on with this finally. :o

Okay then, so there is still a huge amount to do on the chassis but as I said last time, I decided it was time to tackle the body
of the vehicle itself with the usual caveat that I most likely do it completely wrong to how others might do it. Anyway, on we
go, you will either learn a little something or have a good laugh at least watching me fumble around. ;)

The defining visual feature of anything and what gives it much of its character is I think due to its looks. :D

The bodywork of such a well-known vehicle is probably the most difficult aspect to get right, it has to look right, how
many times, do you look at a drawing or painting of something and think that it does not quite fully capture what you
feel is that distinct look, it does not look right, to you at least even if it does to others. Even the cab of this vehicle
is distinct from many other designs although it is essentially a box, to such a degree that for me it will ultimately make
or break the overall look and feel of the whole project at the end. o_O

So, let's make a start somewhere and see where we get to with it eventually. 8)


I made a basic shape leaving out the roof to give me a base from which to work:
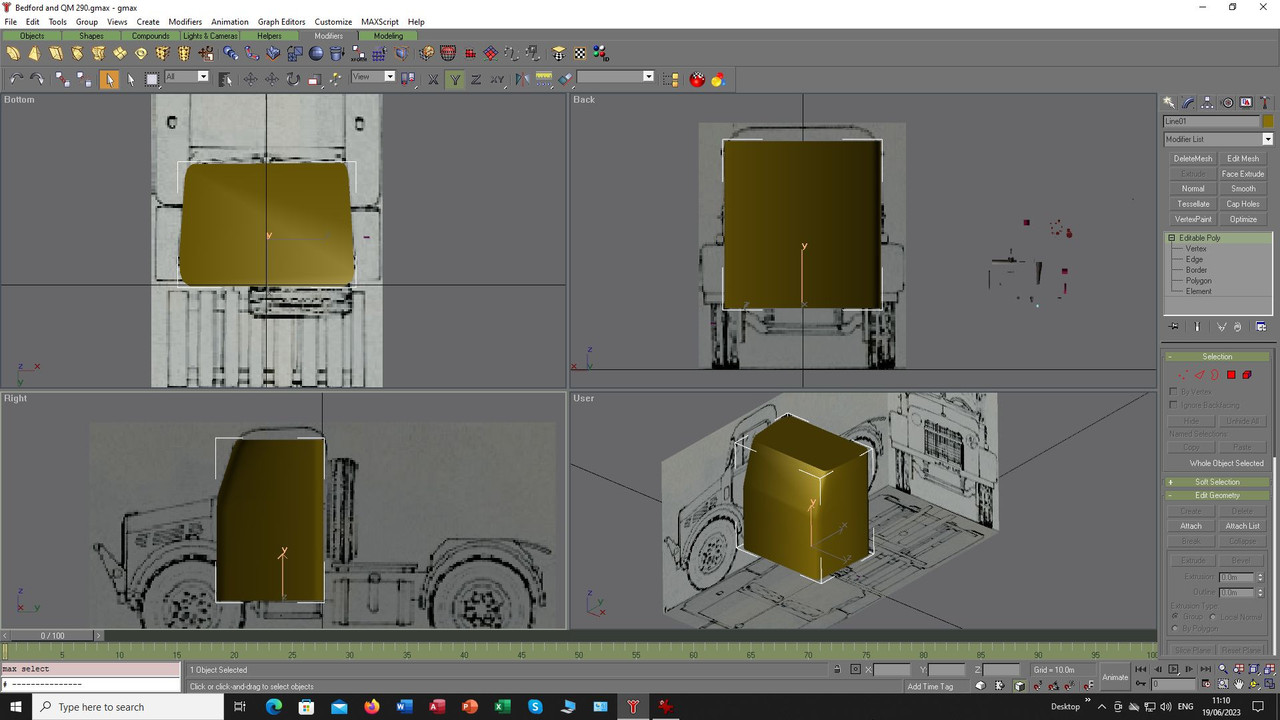


With the Thorneycroft I started with a solid structure and eventually cloned that to make the opening doors
but here I will cut things out first and so make the shape for a Boolean cut:


Above I used the tool to make it semi-transparent to help in formulating that shape and once satisfied turned
things back to normal:


With the cut made you get a lot of vertices left, why I know not:


I tend to try and clean this up by welding them together to just leave my original shaped vertices:


With the door shapes cut out I then do the same thing for the windows:


Front and the smaller rear window:


And there you have the basic shape all cleaned up of surplus vertices:
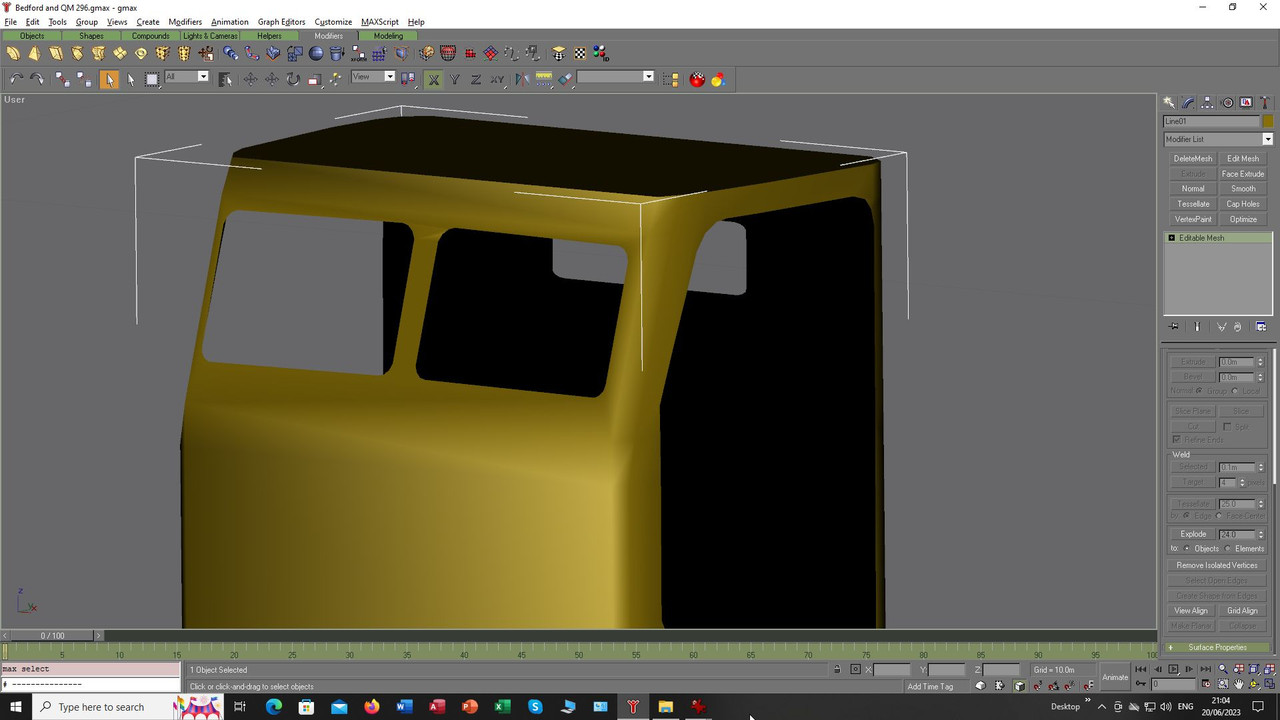


The shape was cloned and flipped to make the inside:
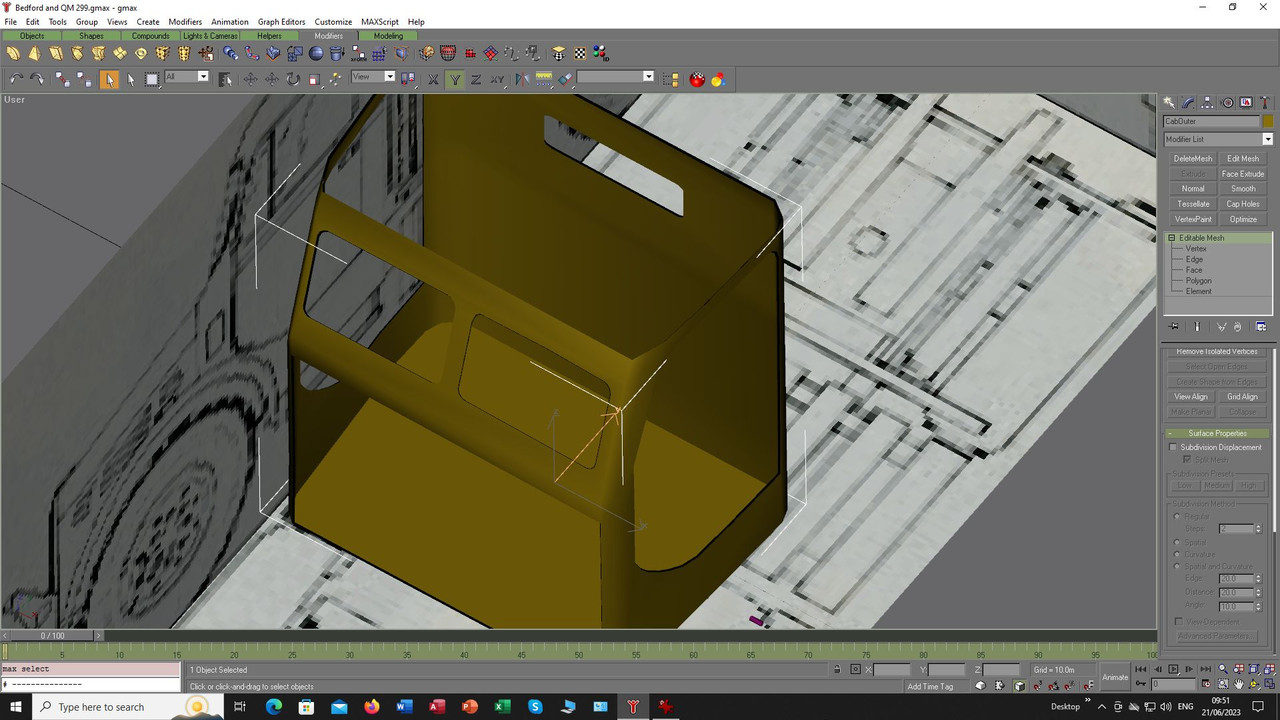


At this stage I joined the two and decided to map what I had so far, the black lines help me align stuff:


Something I did not do on the Thorneycroft was add in the faces between front and rear sections of the door and window frames
and it caused me some issues so this time I went through the tedious process of doing it this time around, whether it helps or not
I will find out eventually:


The mapping of those inner faces caused me some headaches as I made them all at once and when I came
to map them I got myself in a right old mess trying to keep each set of their mapping separate from each other. 
Eventually I loaded up again from the last save and started the process all over again but this time mapped each
opening separately as I finished building those the faces for each window and door frame, doing each item one at
a time and making the process so much more pain free. You live and learn, and this whole thread will hopefully help
you guys avoid my mistakes if you do your own projects as you try and figure out what works best for you.


Anyway, I got there in the end and here we see the completed structure all painted up:


And as usual we go for a test in the sim:


Here I found two problems:

1. I had changed the names of my textures to account for the new one for the cab, however, I had not
renamed this in the base mat so had what were see through parts, I had fixed that for the above image.

2. As you will see by having other parts hidden in the view as I constructed the cab so I could concentrate
on the drawing I ended up with the wheels protruding into the cab mesh.


So, back into gmax and take a section out of the lower cab to try and form a section where the wheel arches
will eventually go:


Doing Boolean cuts always is a trial-and-error thing for me as I forget how I last did it and to be honest I don't
think I could really describe the messing I did for this cut suffice to say I got there in the end.


The final mesh back in sim:


As you have probably gathered, I seem to make things harder for myself than they really need to be and a little
forethought might help, I am not a professional 3d artist so can only present my trials and tribulations as I go and
hope they help you avoid similar experiences.  I know they won't but I can try. :D

Next up I will try and actually make the doors this time without cutting them out of a solid but that is for another
day and time and for now that is it until next time.

Take care and be safe.

Wishing you all the very best, Pete. ;D
Logged
Pages: 1 ... 4 5 6 [7] 8 9 10 ... 12   Go Up
 

Page created in 0.033 seconds with 24 queries.