Special Aircraft Service

Please login or register.

Login with username, password and session length
Advanced search  
Pages: 1 ... 5 6 7 [8] 9 10 11 12   Go Down

Author Topic: Bedford OXC and Queen Mary trailer. Second part of the recovery set build.  (Read 15644 times)

0 Members and 5 Guests are viewing this topic.

Mission_bug

  • Modder
  • member
  • Offline Offline
  • Posts: 6043
Re: Bedford OXC and Queen Mary trailer. Second part of the recovery set build.
« Reply #84 on: September 17, 2023, 03:25:45 PM »

Hello again guys here are some more images of the ongoing build, yes, I am still at it. :D

There is now a link in the first page of the WIP so far if any of you want to take a look at it in game and tinker yourself. ;)

So, where were we?


Construction of the front end has started here with bonnet, removeable side panels and the front face of the
engine bay and the doors all ready to map and paint:


Trying to make the sunken holders that will eventually hold the lights:


Those parts in the process of being attached and welded to the other mesh:


Mapping and painting of the doors:


Mapping and painting of the front engine bay parts complete:


For simplicity of build the roof was made as a separate item, here I am trying to capture the shape as best I am able:


I was not sure how I would attach the roof, whether I would weld it to the cab or just fix it with the hier so I
filled in the gap that was formed between the inner and outer shell when I cloned and flipped the faces of the
original shape to make the interior:


Eventually I decided I would weld it together with the cab and so did the inner shell first and then the outer
after deleting the rim I had added previously:


Trying to finalise the shape and smooth bits out:


I was unsure how best to make the mudguards, first one I drew a shape from the side view and cloned that
to make an overall shape, the complete green one, I was not happy so went with shapes done the other way
around that worked better:


Here the original shapes are combined with the first of the various modifiers I would use to complete the shape:


With a bit of tweaking, it looked okay, ish:


The green face is intended to represent the wire frame that protects the radiator, it will eventually have alpha
cut holes for the grill:


And eventually into sim:


For those of you who bother with the current WIP download the above two images show what is in the link,
there is still much to build as at the moment it is devoid of cab and engine detail as well as the bits at the rear
for towing etc but at least the shape is together, some faces will need attention as well but at least it is now
starting to look something like, I hope. :o

Take care and be safe.


Wishing you all the very best, Pete.  ;D
Logged

stanislao

  • Modder
  • member
  • Offline Offline
  • Posts: 1581
Re: Bedford OXC and Queen Mary trailer. Second part of the recovery set build.
« Reply #85 on: September 18, 2023, 12:45:50 PM »


 ;D  I'm happy to see the project continue to develop! Keep us updated on the progress!


Logged

Mission_bug

  • Modder
  • member
  • Offline Offline
  • Posts: 6043
Re: Bedford OXC and Queen Mary trailer. Second part of the recovery set build.
« Reply #86 on: September 19, 2023, 10:21:56 AM »


 ;D  I'm happy to see the project continue to develop! Keep us updated on the progress!


Hello stanislao, good to know you are still following and happy with the updates so far. 8)

Other things get in the way of commiting a lot of time to this but I do continue to still slowly build it over the months and when I think there is enough to show I post something up. ;)

Take care and be safe.

Wishing you all the very best, Pete. ; ;D
Logged

Flying H

  • member
  • Offline Offline
  • Posts: 1341
  • "And you can fly, high as a kite if you want to..
Re: Bedford OXC and Queen Mary trailer. Second part of the recovery set build.
« Reply #87 on: September 19, 2023, 11:54:30 AM »

Great to see your working on the prodject again. If I spot something I can give some advice on I´ll give you a notice, as I´ve done earlier.
Logged
And you can fly, high as a kite, if you want to.........

Mission_bug

  • Modder
  • member
  • Offline Offline
  • Posts: 6043
Re: Bedford OXC and Queen Mary trailer. Second part of the recovery set build.
« Reply #88 on: September 19, 2023, 03:26:53 PM »

Great to see your working on the prodject again. If I spot something I can give some advice on I´ll give you a notice, as I´ve done earlier.


Thanks for that Flying H, always good to have someone in the know keep me on the right path. 8)

It will always be difficult to replicate something like this, no one does it better than the original manufacturers, all I can hope for is to have it look somewhere close. ;)

Take care and be safe.

Wishing you all the very best, Pete. ;D
Logged

Mission_bug

  • Modder
  • member
  • Offline Offline
  • Posts: 6043
Re: Bedford OXC and Queen Mary trailer. Second part of the recovery set build.
« Reply #89 on: November 14, 2023, 12:30:18 PM »

Hello guys, here is a further update of the build for any of you following it.  ;)

Okay then, the cab was without detail so next up was to do something with that, I offered up the Thorneycroft interior
just to see what if anything might be of use:


All I used from the Thorneycroft were the seats, gear stick and hand brake and the pedal faces:


Here I attempt to build the engine bulkhead of the cabin with the dash for the instruments:


Trying to adjust it to fit the existing cab and wheel arches:


The shroud that covers the gearbox:


Seat frames, battery box and rear cab trellis work:


Adding the stuff from the Thorneycroft to the Bedford cab template to colour them:


Starting to add the trim to the bulkhead and shroud along with a few levers here and there:


Panels added at the side of the shroud and various other detail bits, I did not cut any holes in the shroud so
those panels are not intended to display detail inside there, at the moment anyway:


Making the instruments for the dash, these have separate parts to represent the glass but not the working dials:


Mapped and painted as I go, there is what appears to be some form of vent at each side of the bulkhead
but exactly what it is or how it works I know not so just made something to look like it:


The trellis and seat stands mapped and painted:


The interior done with a placard added from the Thorneycroft and a third wheel from my WIP Thorneycroft
articulated added as a tempory measure while I make a proper one for the Bedford, there are different styles
so I need to decide what is most appropriate:


Into the sim, the doors hidden so you can see inside:


Driver used from Thorneycroft suitably shoehorned into this model and temporary thirdwheel fitted:


There is also a new download of the work so far if any of you wish to try it out.  :D


Take care and be safe.

Wishing you all the very best, Pete. ;D


Logged

cgagan

  • SAS Team
  • member
  • Offline Offline
  • Posts: 5794
Re: Bedford OXC and Queen Mary trailer. Second part of the recovery set build.
« Reply #90 on: November 14, 2023, 12:36:39 PM »

You never cease to impress us Pete! Keep up the good work! 8)
Logged

Bison_M

  • Modder
  • member
  • Offline Offline
  • Posts: 1129
Re: Bedford OXC and Queen Mary trailer. Second part of the recovery set build.
« Reply #91 on: November 15, 2023, 01:08:15 AM »

Great detailisation! ]thumleft[
I didn't install Bedford, but I looked at it in the meshdumper:


Keep going!

Best wishes! ]cheers[

Alex
Logged
El sueño de la razón produce monstruos

Mission_bug

  • Modder
  • member
  • Offline Offline
  • Posts: 6043
Re: Bedford OXC and Queen Mary trailer. Second part of the recovery set build.
« Reply #92 on: November 15, 2023, 02:27:57 AM »

You never cease to impress us Pete! Keep up the good work! 8)

Glad you like it so far Costas, thank you very much for the kind words.  8)

Great detailisation! ]thumleft[
I didn't install Bedford, but I looked at it in the meshdumper:

Glad you like it Alex, go on, install it.  :angel:

Take care and be safe.

Wishing you all the very best, Pete. ;D
Logged

PO_MAK_249RIP

  • CMON U SPURS!
  • member
  • Offline Offline
  • Posts: 2083
Re: Bedford OXC and Queen Mary trailer. Second part of the recovery set build.
« Reply #93 on: November 15, 2023, 06:11:06 AM »

Your attention to detail is simply amazing cant wait to see it finished!
Logged
Corsair Carbide case, Intel core i5 4690 3.5ghz with Arctic Cooler, Asus Rock H97 performance, MSI Ventus XS OC 1660GTX 6GB DDR6, 32GB Patriot Viper 1600Mhz, 256GB/500GB Crucial SSDs, Windows 10 64bit.

Mission_bug

  • Modder
  • member
  • Offline Offline
  • Posts: 6043
Re: Bedford OXC and Queen Mary trailer. Second part of the recovery set build.
« Reply #94 on: November 15, 2023, 01:15:09 PM »

Your attention to detail is simply amazing cant wait to see it finished!

Glad you like the work so far PO_MAK_249RIP, thank you very much for the kind words.  8)

The model was not made specifically for the sim and so I did get a little carried away with the detail, certainly with the Thorneycroft, however, I did try to keep each mesh within the boudaries of IL-2 so I could at least test it in game to see what it looked like and also make it available to any of you guys who might want to add it in to your own install, hopefully a win, win for all. ;)


As for when/if I will ever finish it I know not, hopefully I will get there eventually, if not the meshes are in the first post to enable someone to carry on if I do not make it over the finish line.  :D


Take care and be safe.

Wishing you all the very best, Pete. ;D
Logged

Mission_bug

  • Modder
  • member
  • Offline Offline
  • Posts: 6043
Re: Bedford OXC and Queen Mary trailer. Second part of the recovery set build.
« Reply #95 on: January 14, 2024, 03:04:05 PM »

Hello again guys, time for a further update on progress I think for those of you still following this build. ;)

Okay then, where are we?


After uploading the last update, I decided to try and add mirrors, lamps and door handles and the intention
was to try and use those from the Thorneycroft so I made a start with the mirrors:


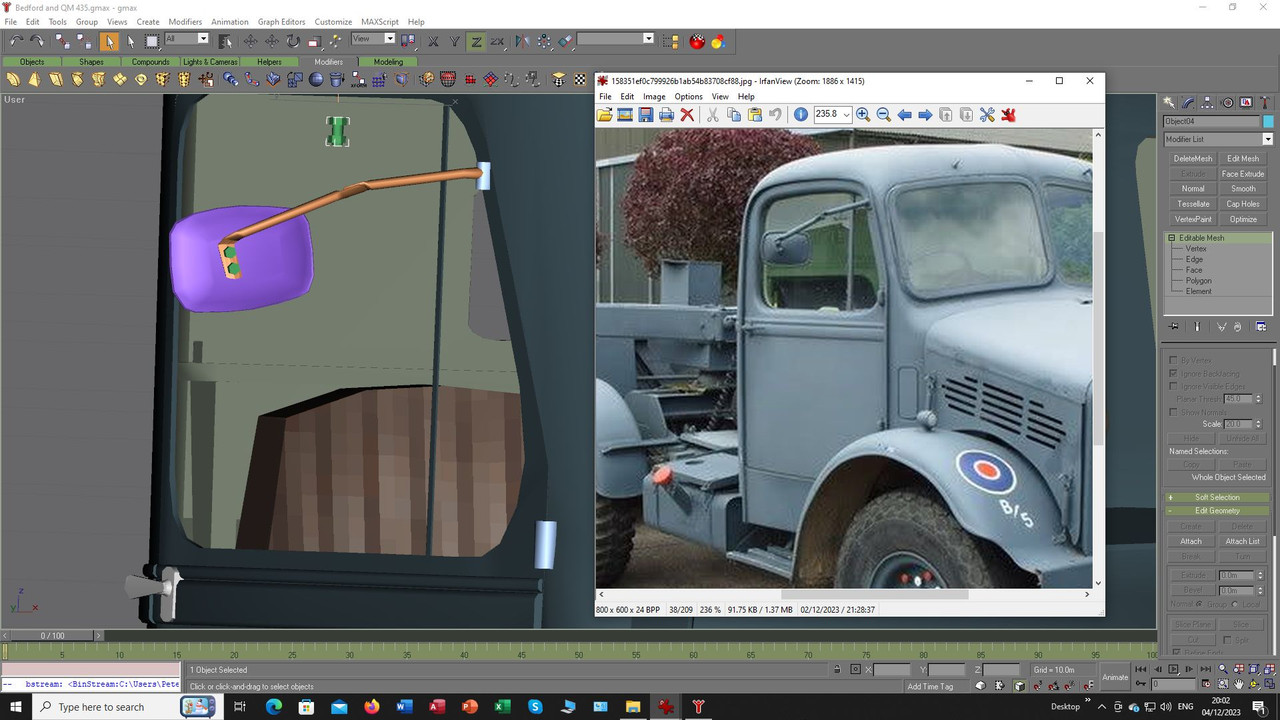
My existing ones did not really resemble those used on the Bedford so I began forming a new shape:


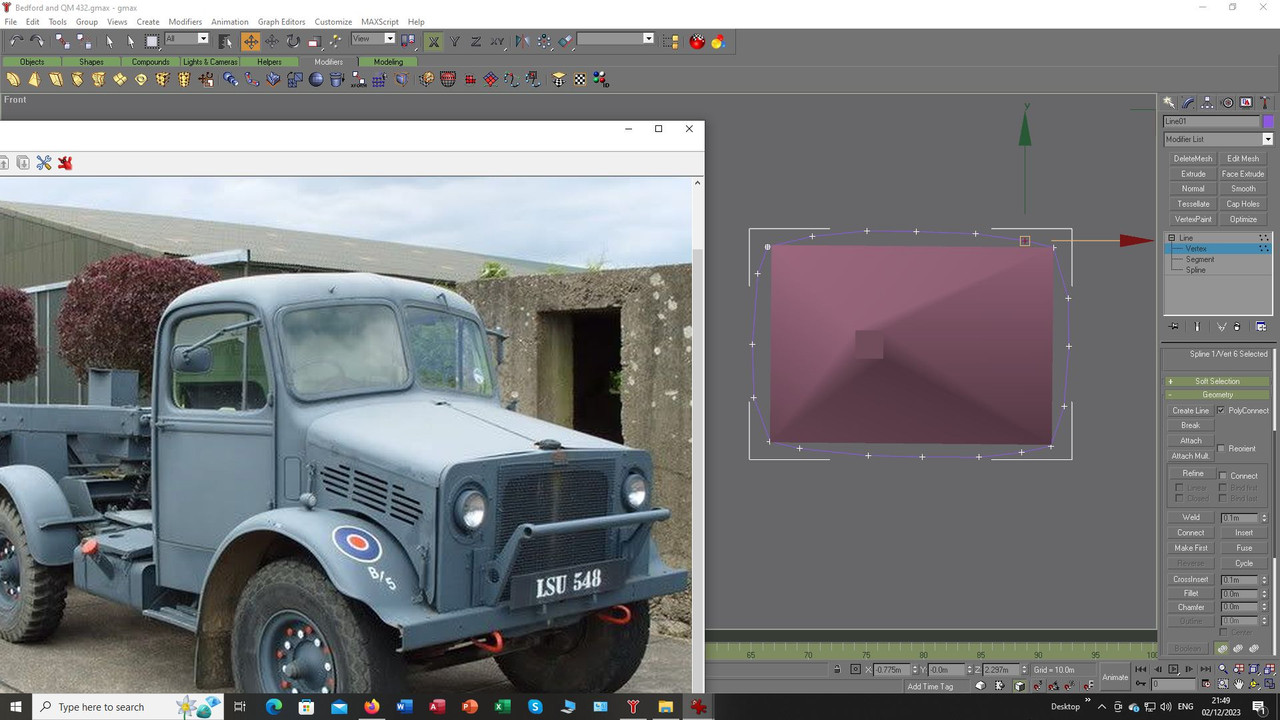
The part coming together after a bit of trial and much error:


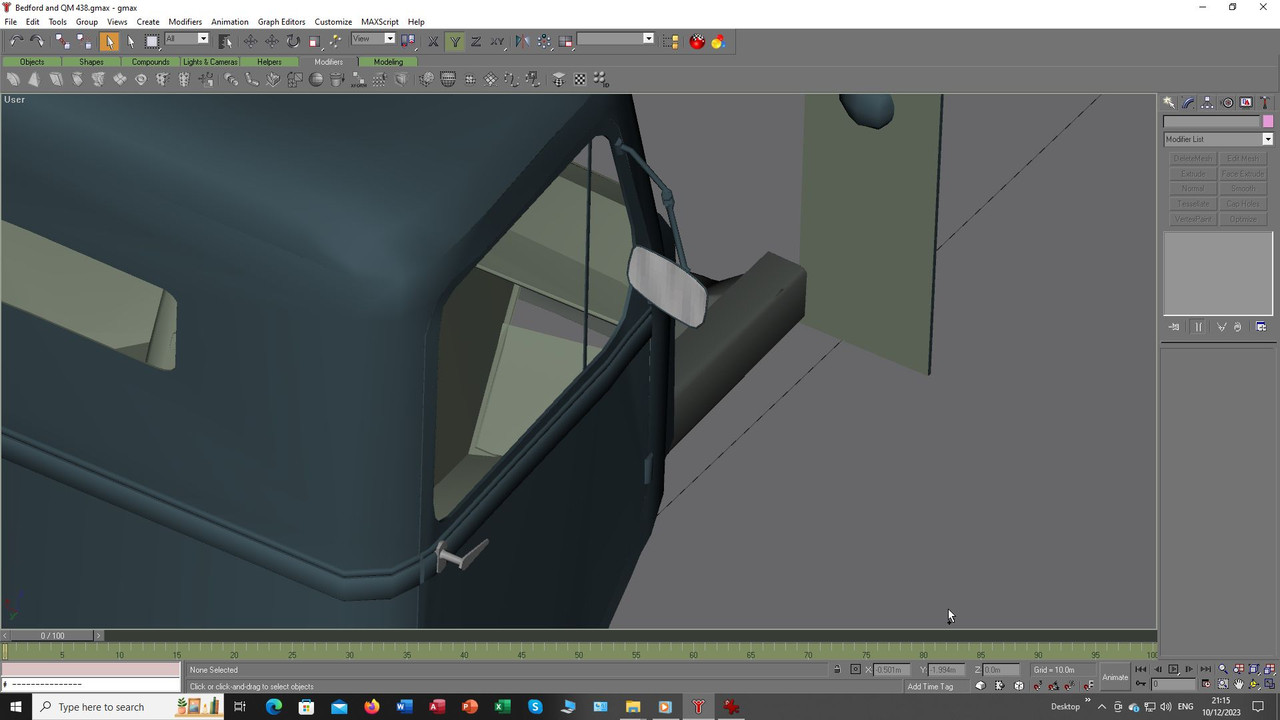
Mirrors and fixings as best I could make ready for mapping:


Painted up and ready for use:


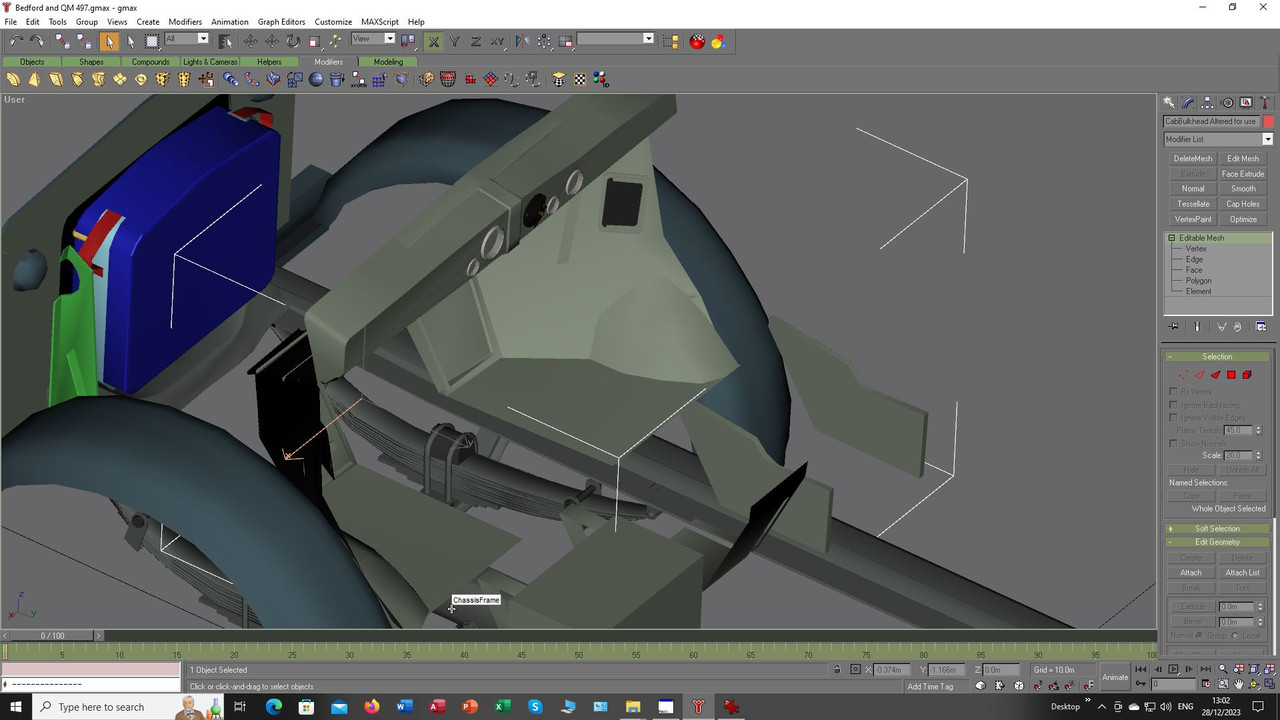
Some of the cab interior meshes were cloned and then their faces flipped to try and construct the engine
bay compartment:


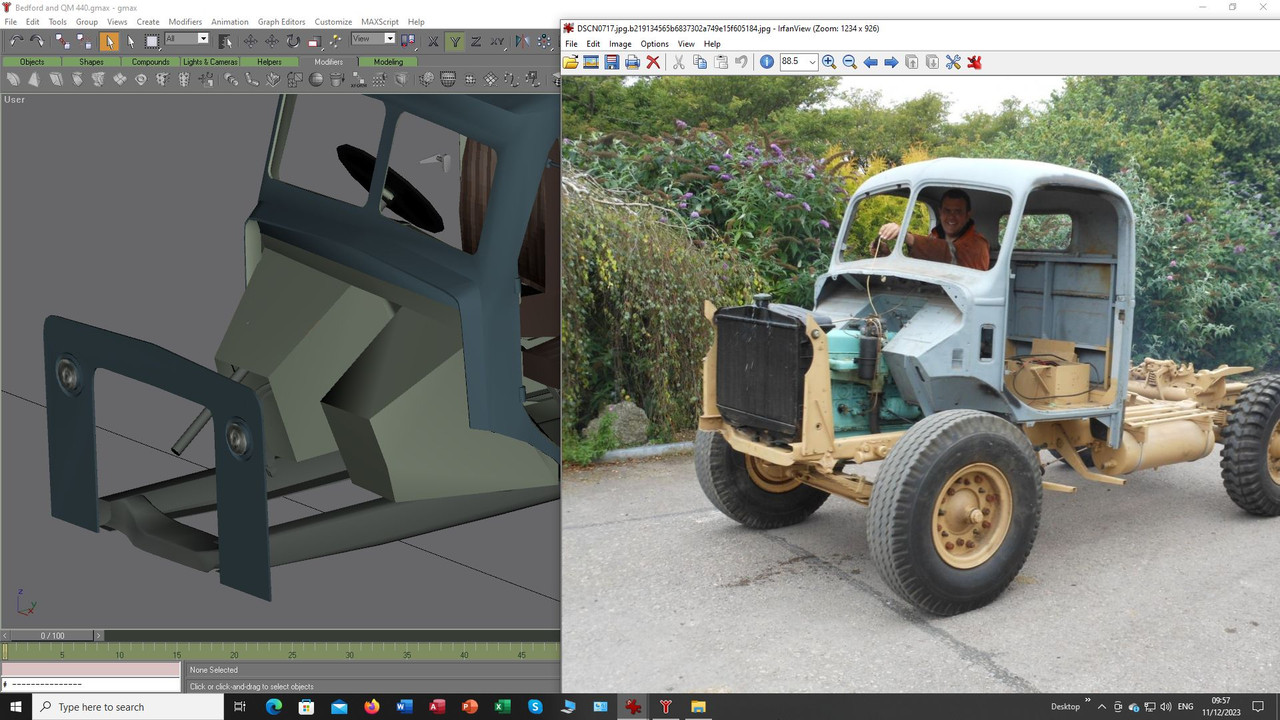
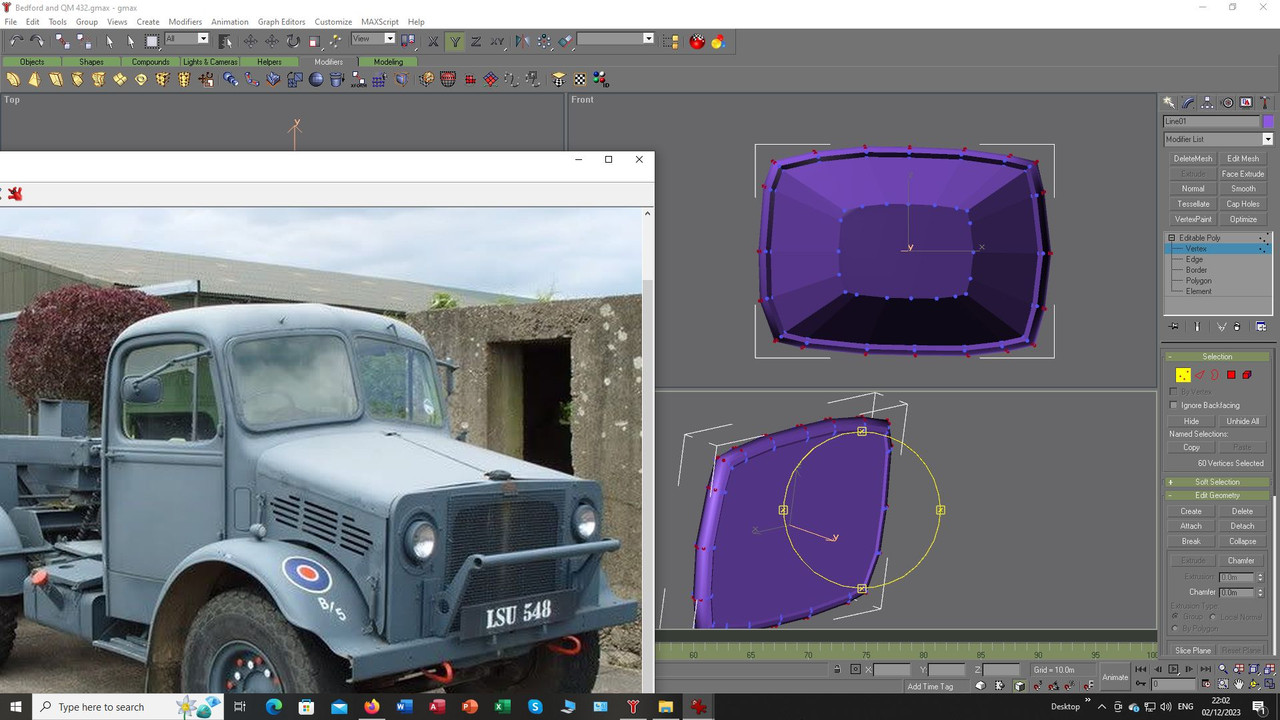
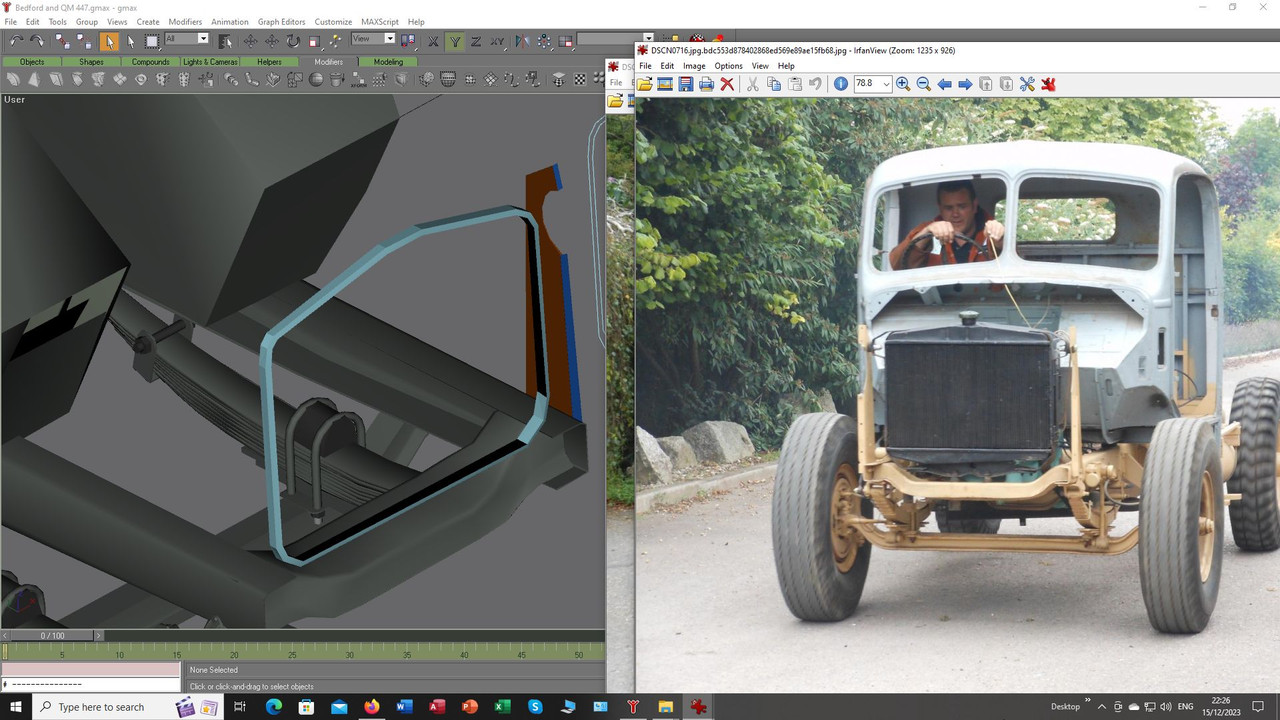
With a start made on the engine bay I opted to try and fabricate the radiator first to avoid that see through
effect when viewed from the front so the rig that holds it in position was started:


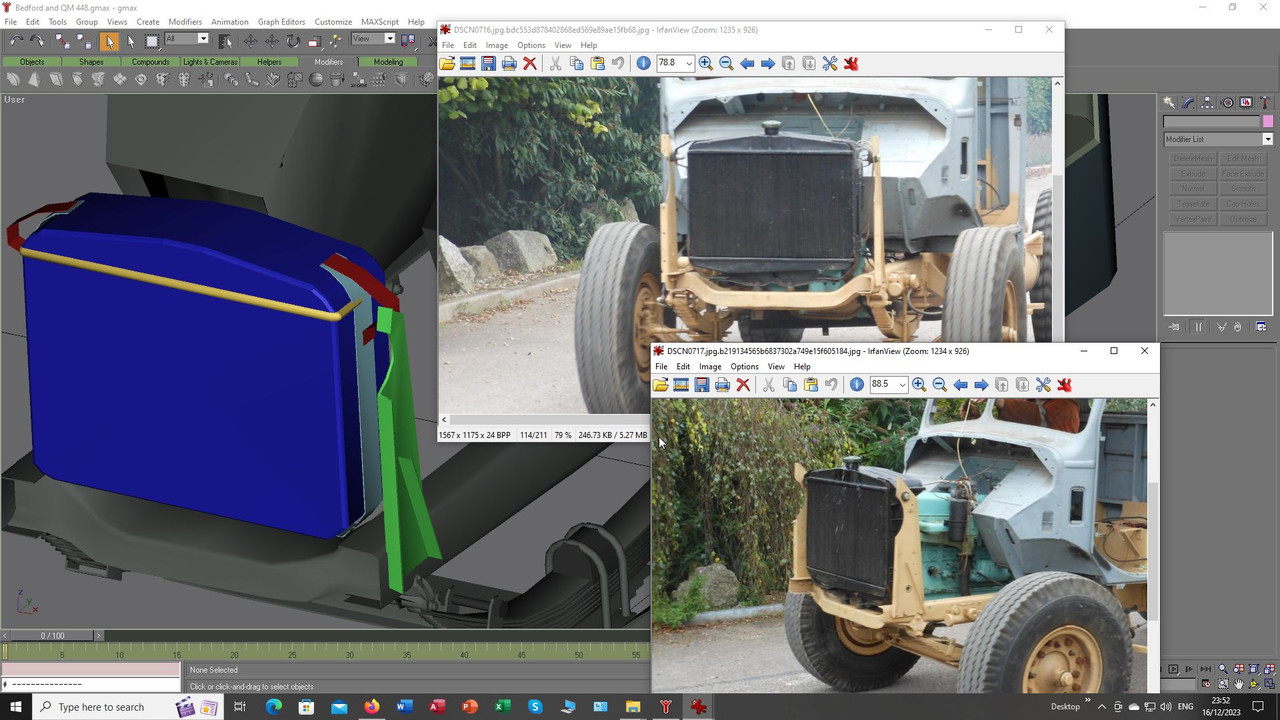
Construction of the shape for the radiator begins:


Further work trying to add the various fixings and trimmings to the radiator shape:


So far so good, however, I think I have that condition that will not allow me to leave things be and always
wanting to alter them in some way, maybe looking for perfection, not sure. Is this a problem for all model
makers both in plastic and 3d, or is it just me?   Do I have OCD?


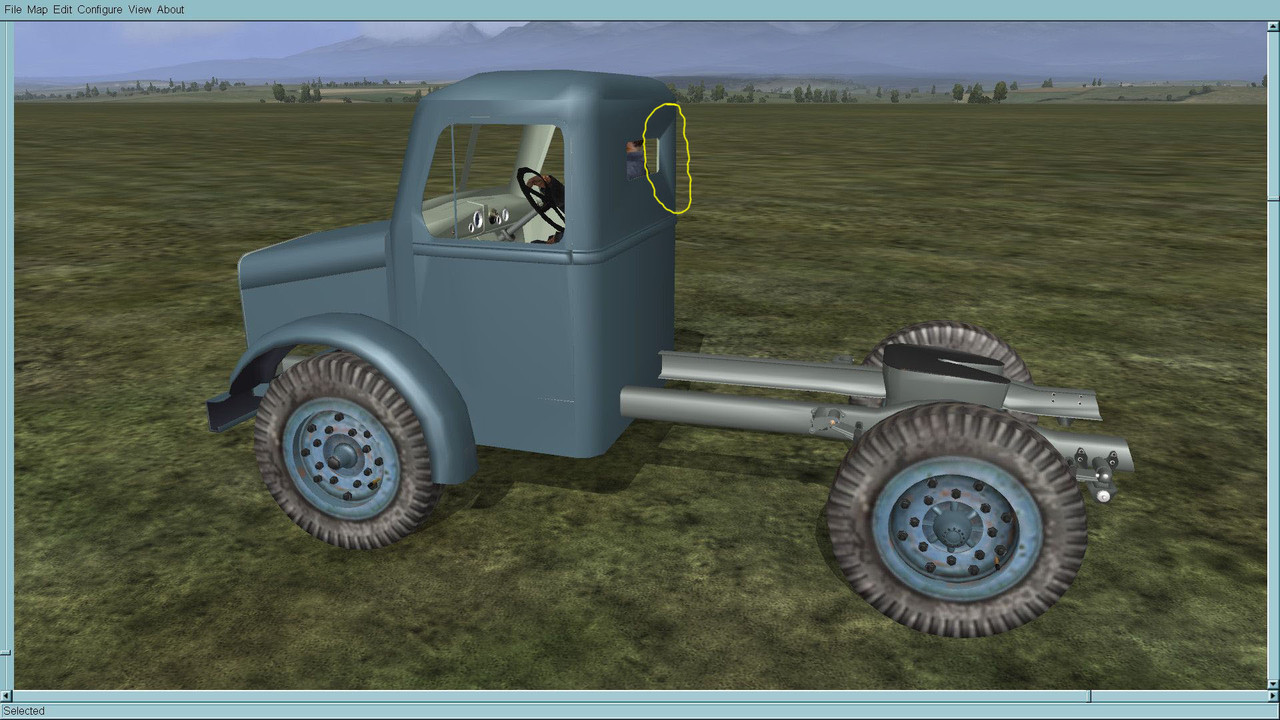
Not sure what it is called but the more I looked at the cab I saw areas I did not like the look of, this for instance:


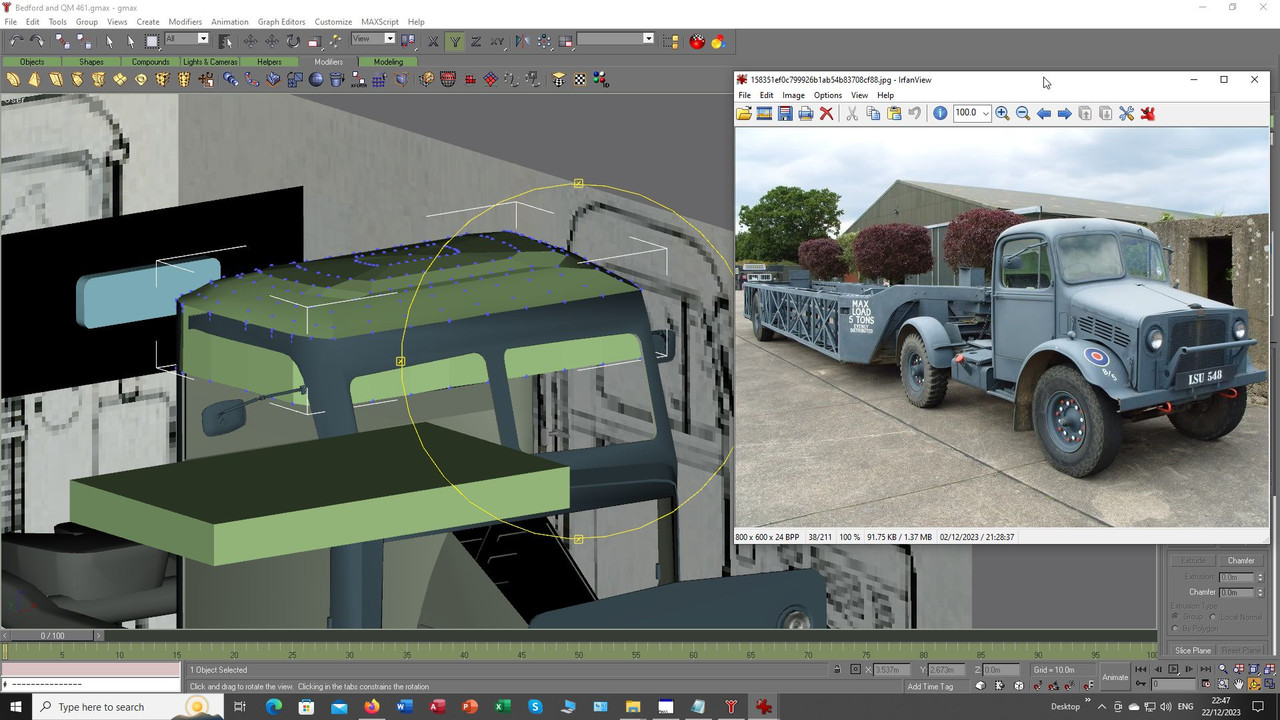
I tried everything, smoothing, cutting bits out, remaking stuff, adjusting vertices, and adjusting vertices and more
and more fiddling with vertices pulling them and pushing them here there and everywhere and generally just making
an awful mess of the shapes I was trying to mend. ::(


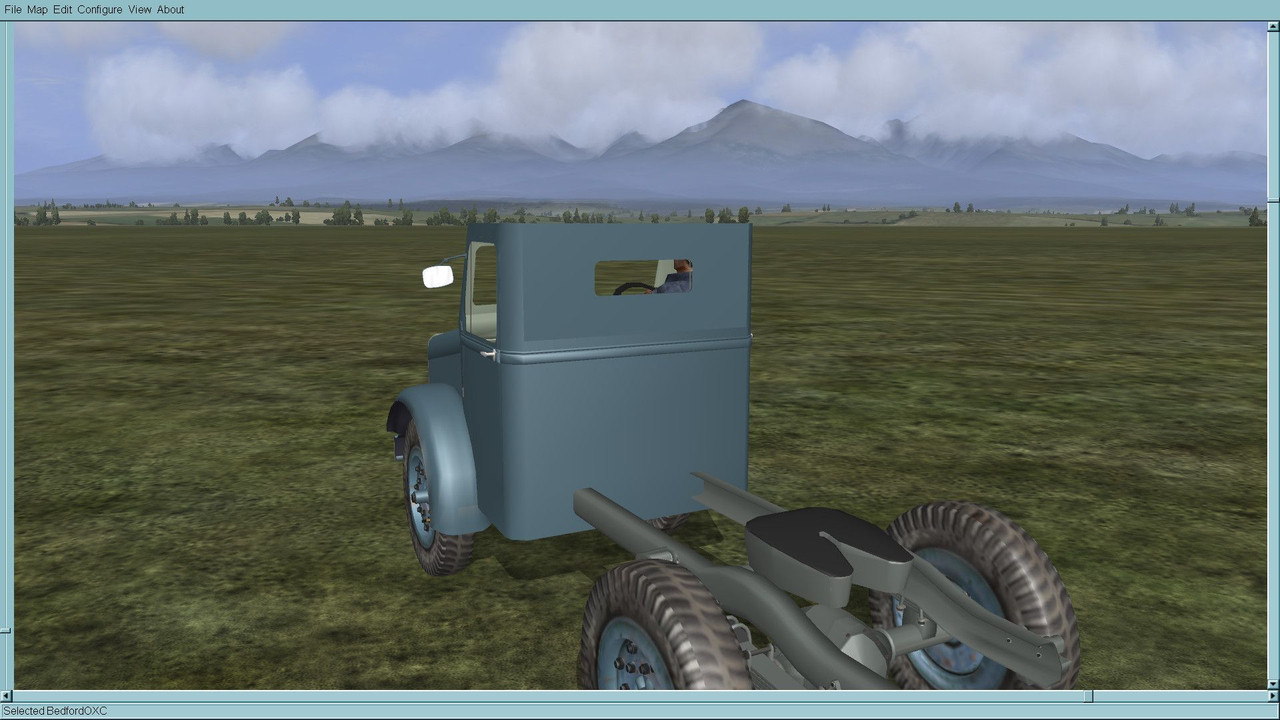
What to do with the effed-up cab, well cutting out sections and replacing previous shapes with new Boolean cuts
was one option I tried and exporting again to replace previous stuff:


Not so bad I thought when in game, it had got rid of the shiny issue I showed earlier:


I tried again to make the roof, I think my original issue was I had this as a separate part and it never quite
fitted to the cab shell but I tried again with a new shape:


I even tried this time to add the spine along the centre of it and it seemed okay:


More fiddling around to improve the interior as there were issues there as well that I never really have
still fully sorted:


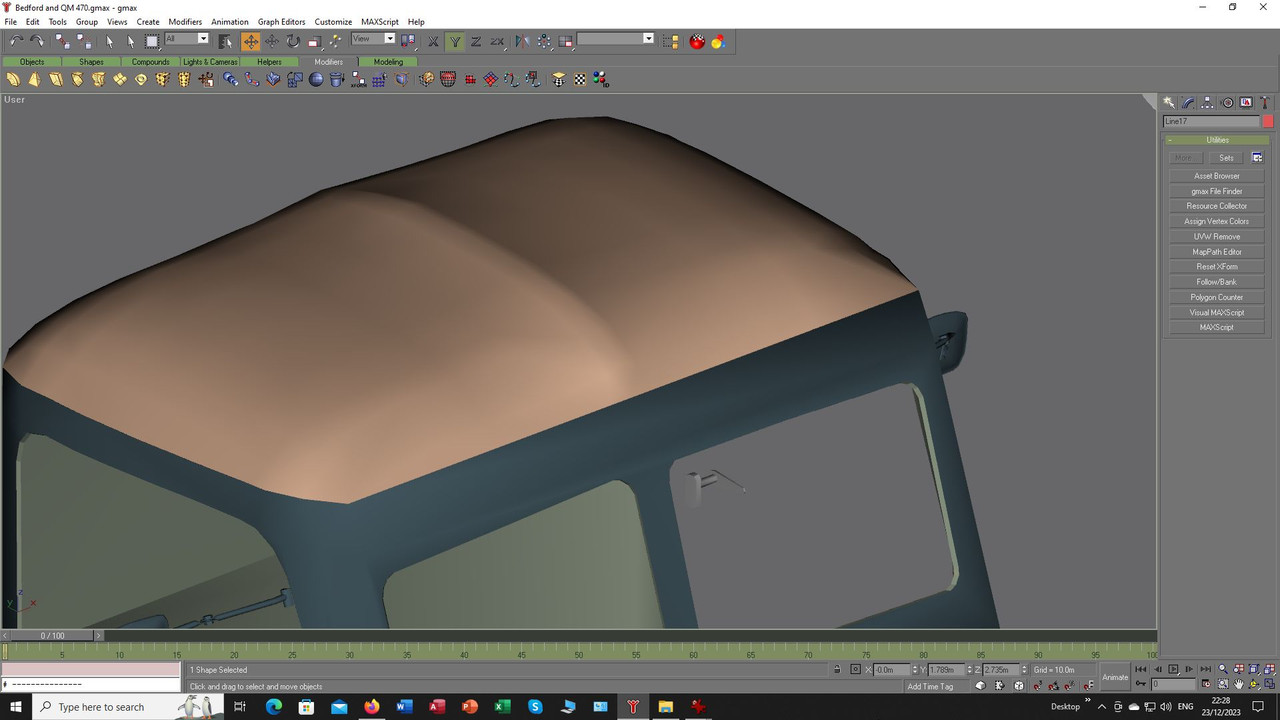
The roof still did not look right as there were not enough vertices to attach it properly to the cab shell so
I decided to make it complete this time all in one:


So far all appeared to look well at least in gmax:


This time I also tried to do the recessed panel detail at the back:


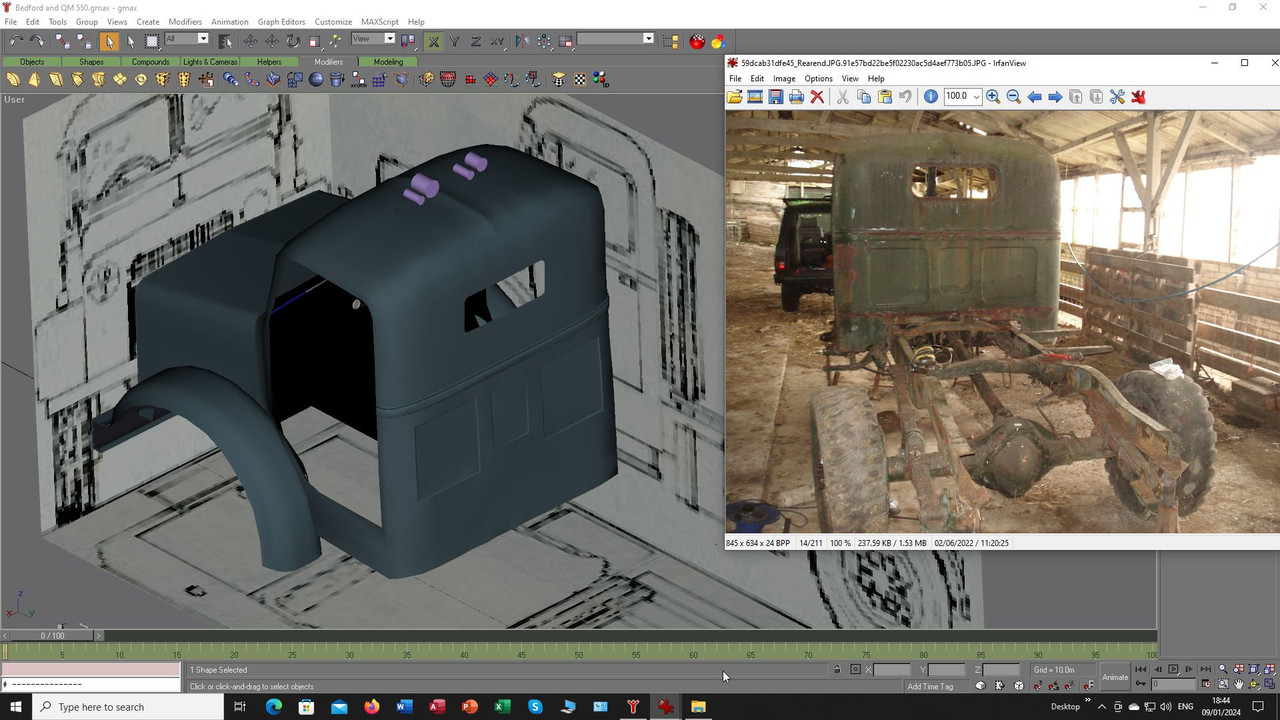
Again there was more tinkering and things that did not quite look right, the shape at the back proved particularly
painful as it just would not look right in game and shone here and there, again all kinds of things were tried, new
panels cut and attached, higher poly, push this, push that, smooth this and that and by now I was thinking nothing
would ever look right and was pulling out my hair, thankfully I have enough. :D

Anyway, eventually while there were still issues it got there but other areas were still a problem as when they were
adjusted to fit the cab they provided more grief as if I had not endured enough but I carried on. :o

New doors just to further torment myself:


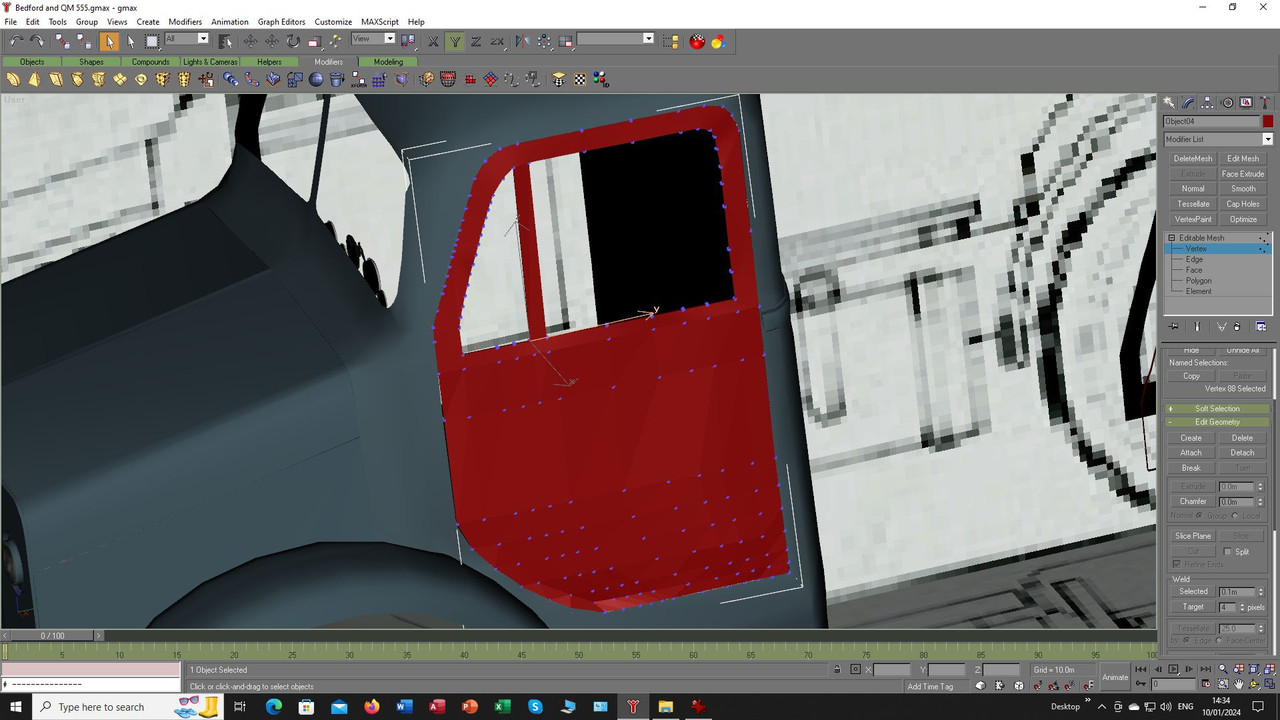
Eventually I had something that was not exactly what I hoped for but was I thought much better than what I originally
made and so I have decided to live with the cab as it is, the bonnet was also made again just to further inflict more
pain on my tormented mind but I am going to have to live with things as they are now as I cannot get it any better.  :-[

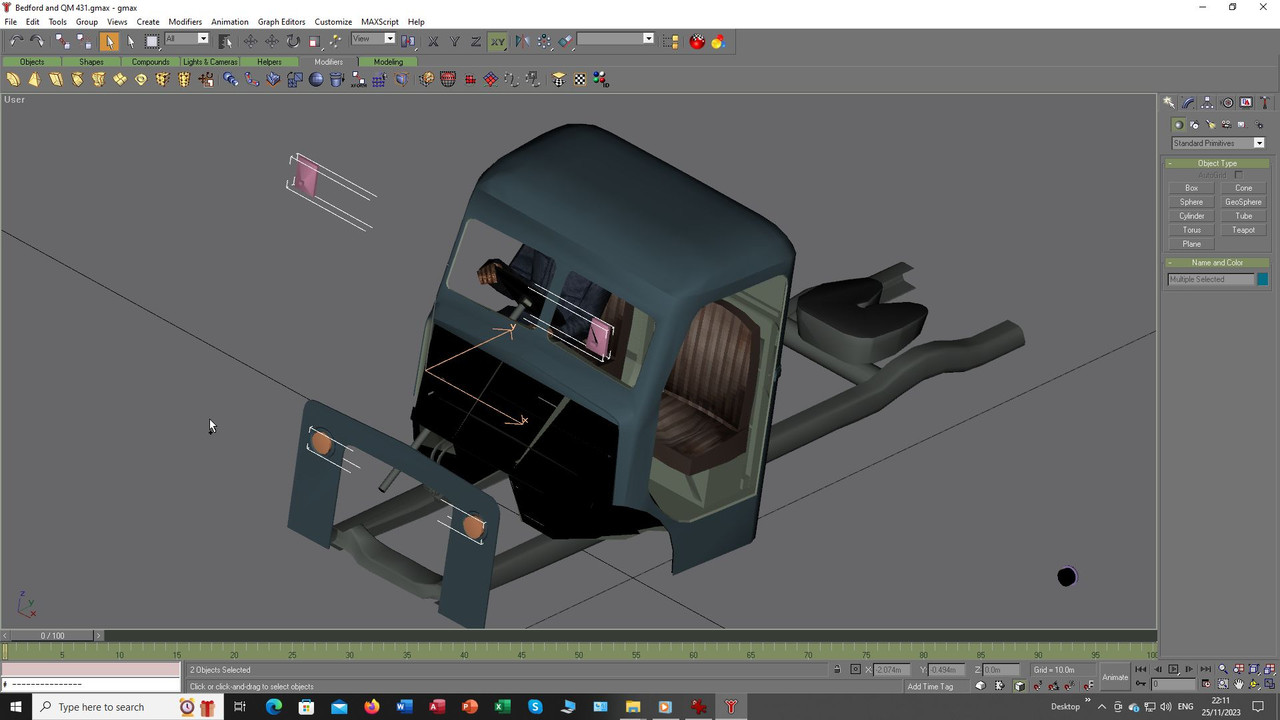
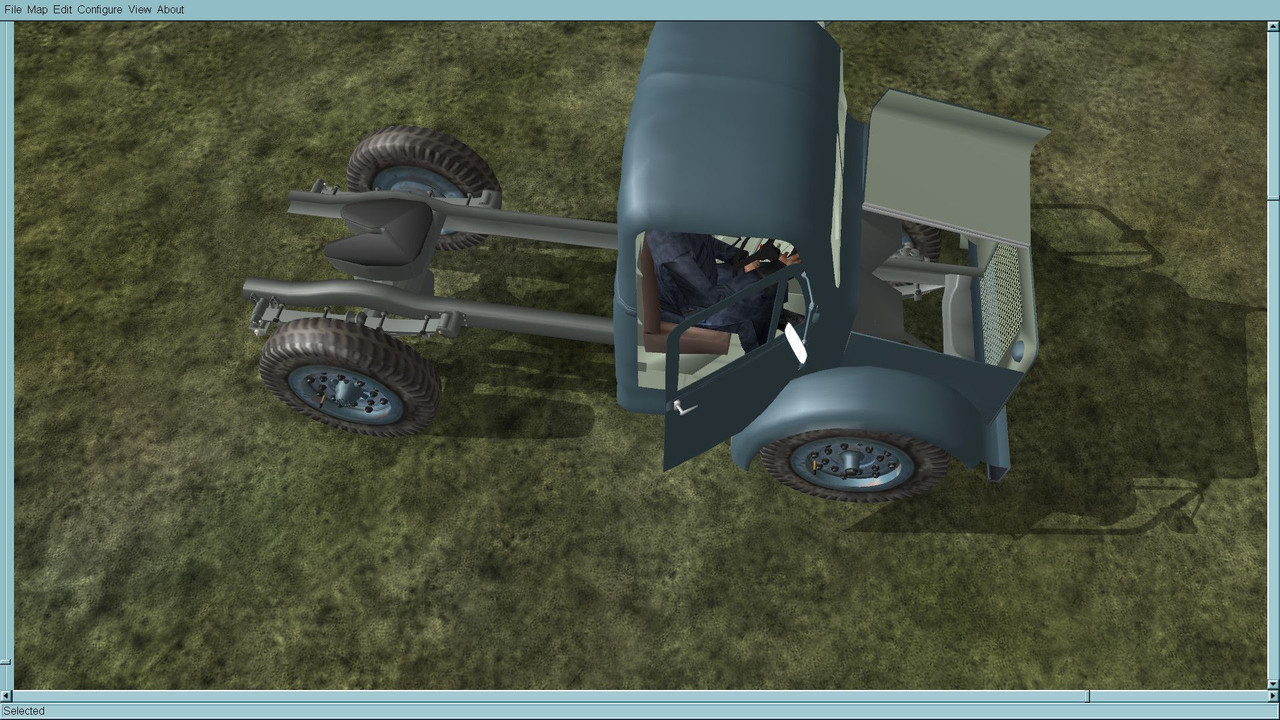
Next up I decide to open the doors. Oh yes I know, I was surely going to make a rod for my back to beat myself black
and blue with but thankfully this was relatively pain free as I only had to clone the doors and orient them in the open
position. At the same time, I realised I would also have to do that with the mirrors and handles and so it is for the static
object:


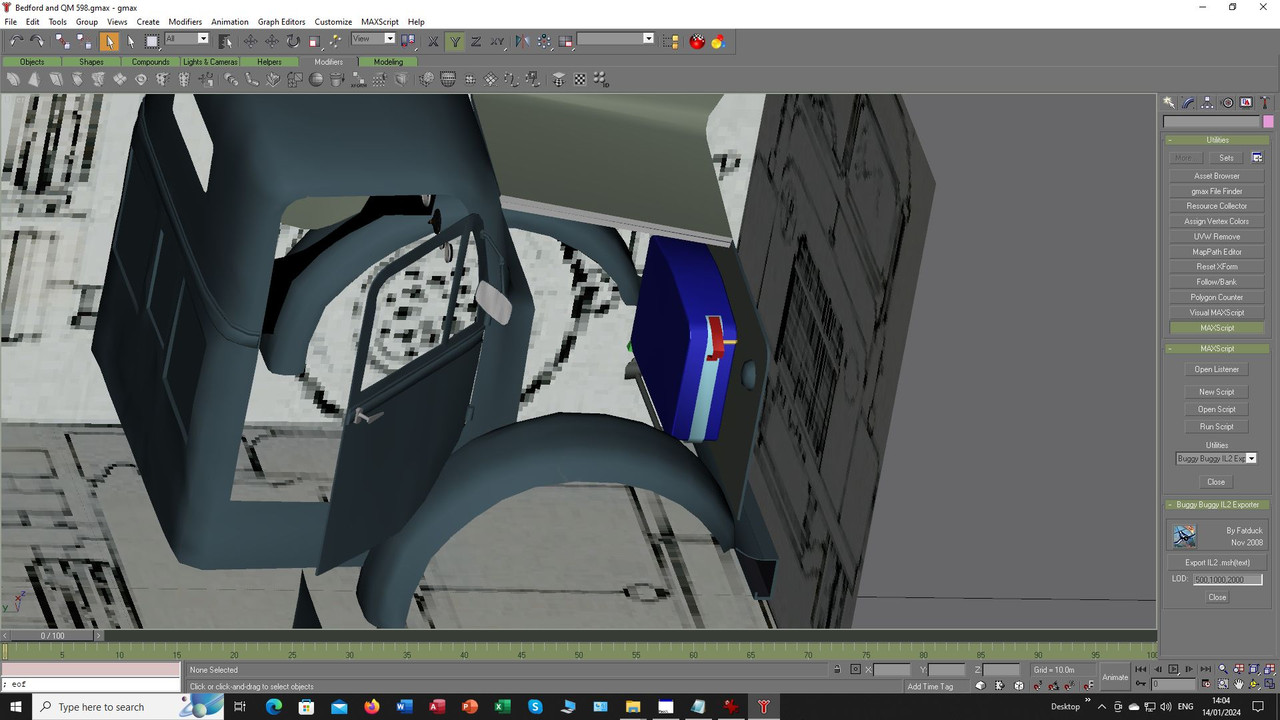
Anything else while I am here, oh yes I know I also used the headlamps suitably adjusted from the Thorneycroft. :P


And so, after all that here is what we are left with as seen in the sim:


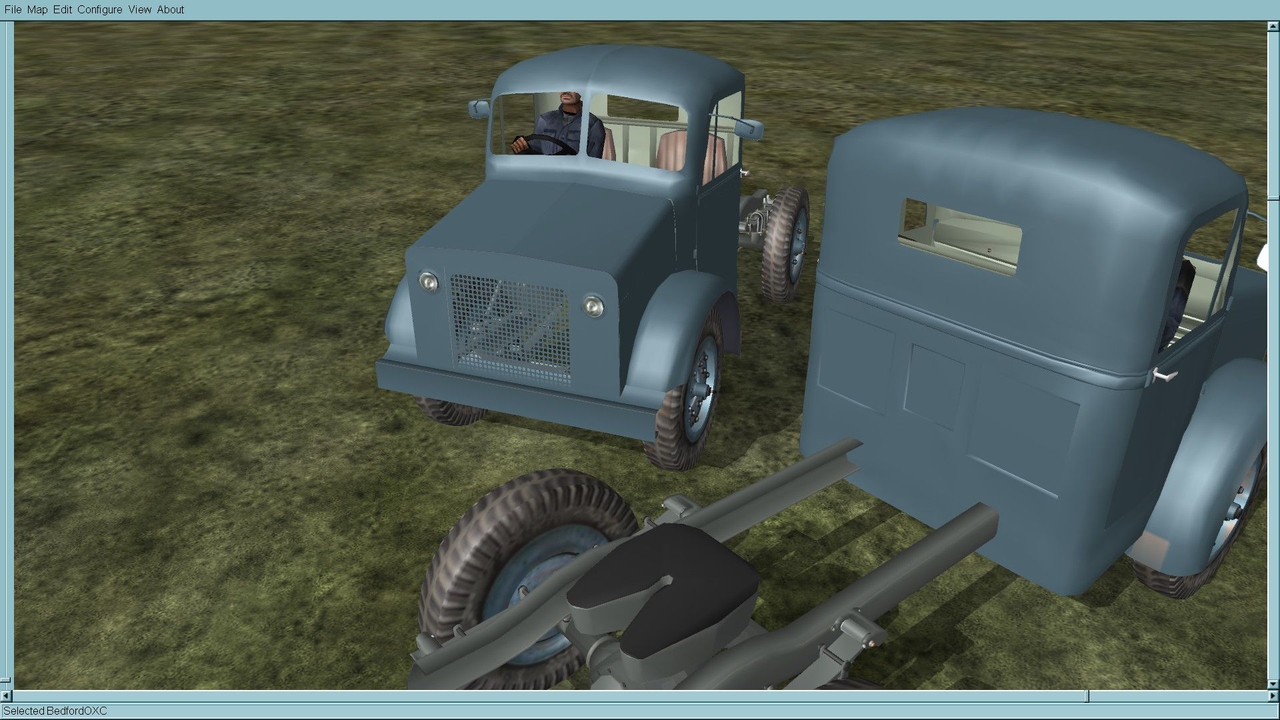
To say this was torturous is an understatement, I even took a leaf from my Blender course and tried the
cab re-build as one half, that is what you now have in the new link, it is as it is and is as good as I am
able to get it to look, I will continue with the build but I really need to seek medical help for this condition I
seem to be afflicted with. :angel:

Maybe I also need a good tutor, someone better capable with this stuff who can guide me!


There is now a new link to what I just outlined in the first page, no need to change entries in the STD folder,
they are as they were, all the changes are in the mesh folders so please completely replace the old folder and
use the new download.  ;)

Oh yes, I also forgot to mention that the radiator is not finished as I got waylaid trying to fix things, maybe next time. :D

Phew, I need a brew, where is that Halo series CD, I need a break to watch some TV.

Take care and be safe.

Wishing you all the very best, Pete.  ;D
Logged
Pages: 1 ... 5 6 7 [8] 9 10 11 12   Go Up
 

Page created in 0.039 seconds with 25 queries.